Monday, August 13, 2012
Tres Leches Cake
I am, by nature, a procrastinator. My parents had nicknamed me 'the Queen of all things last minute'. It is not hard to see why. When in school, the homework would be done early in the morning between large gulps of milk, in college, projects would be finished by burning the proverbial midnight oil. Even today, I tend to fill out forms minutes before they need to be actually submitted. If you need any further proof of just how I tend to procrastinate, check out my entries to various food blog events...most of them are after the submission date.
When it comes to making desserts, however, I am the exact opposite. I will usually start making desserts soon after I have read the recipes - before I have even ascertained that I have all the ingredients that a recipe calls for.
So, why it took me almost 5 years to make the Tres Leches Cake is beyond me.
I first heard of, or rather read about, the Tres Leches Cake when I was looking up recipes for the Dulce de Leche flan. 'Pastel de Tres Leches' appeared as a related recipe on one of the many sites I visited.
I was intrigued by the Tres Leches Cake. The entire concept of mixing together and pouring a combination of 3 types of milk, and hence the name which translated means 3 milks cake, (condensed milk, evaporated milk and fresh cream) over a sponge cake fascinated me. Ever since I read about the cake, I made it many times....in my head. Sometimes, I would top the cake with mangoes. Other times, it would be peaches or lychees.
But I always stopped short of actually making the cake. I think it was fear that the milk mixture, devoid of any flavouring, would make the cake taste and smell very milky.
A couple of weeks ago, I came across a recipe that recommended using buttermilk. I loved the idea of using buttermilk, the tang from the buttermilk would be perfect to counter the 'milkiness' of condensed milk and evaporated milk.
I wasted no more time in making the Tres Leches Cake.

Tres Leches Cake
for the cake (recipe from the Pioneer Woman)
Eggs: 5, separated (mine weighed 51 gms)
Sugar: 1 cup
Milk: 1/3 cup
Vanilla essence: 1 1/2 tsp
All purpose flour: 1 cup
Cornflour: 1 tbsp
Baking powder : 1 1/2 tsp
Salt: 1/4 tsp
Oil: 1 tbsp
Method:
Sift together the flour, cornflour, baking powder and salt.
Whip the egg whites till you get soft peaks. Add 1/4 cup of sugar and whip till you get stiff peaks and set aside.
Beat together the egg yolks and the remaining 3/4 cup sugar till pale and creamy; the mixture should fall in ribbons when the beaters are lifted from the mixture.
Add the milk and vanilla essence.
Next, fold in the flour with a spatula till just combined.
Fold in the egg whites in 3 batches, and then add the oil and mix.
Pre-heat the oven to 350 deg F or 180 deg C. Grease and line a 10" round cake pan (I used a 9" cake pan, but on hindsight, I feel a 10" cake pan will be better; the original recipe uses a 9" x 13" pan).
Bake for 30-35 mins, or until a skewer inserted comes out clean. Cool the cake and then poke it all over right down to the bottom of the cake (at 1/2" intervals) with the skewer.
for the soaking liquid (adapted from Un Dejeuner de Soleil):
Evaporated milk: 1 1/2 cup
Condensed milk: 1 1/4 cup
Buttermilk: 3/4 cup
Brandy: 1 1/2 tbsps, optional
Vanilla pod: 1 small, or vanilla essence: 1 tsp
Method:
Slit the vanilla pod length-wise and scrape the seeds. Add the pod and the seeds to the evaporated milk and heat it till bubbles start to form around the edges of the evaporated milk. Cool and then add the condensed milk, buttermilk and brandy, if using.
Return the cake to the cake pan - I used a 9 1/2" springform pan, which made it easy for me to later transfer the cake on the cake platter - and slowly pour the milk over the cake starting at the edges and moving to the centre. I poured the milk in 3 batches, at an interval of 5 minutes between each addition.
Cover with clingfilm and refrigerate for at least 3-4 hours in order to allow the cake to absorb all the liquid.
for the topping:
Whipping cream: 300 ml
Icing sugar: to taste
Vanilla essence: 1/2 tsp
Frozen mixed berries: 450 gms
Sugar: 1/2 cup
Lemon juice: 1 tbsp
Cornflour: 2 tbsp mixed in a little water
Whip the cream with the icing sugar and essence till you get soft peaks.
Mix together the berries with the sugar and lemon juice and set aside for 30 minutes. Then, cook over a low heat till the berries soften and the juices start bubbling. Add the cornflour and stir continuously till the sauce thickens. Cool to room temperature.
Transfer the cake on a serving dish and spread the whipped cream over the top and sides of the cake and spoon the berry coulis over the top.

I made the Tres Leches Cake for a dinner party and it was devoured. Yes, devoured. There is no other word for it. This is all I was left with the next day; I barely manage to get a decent slice for a picture.
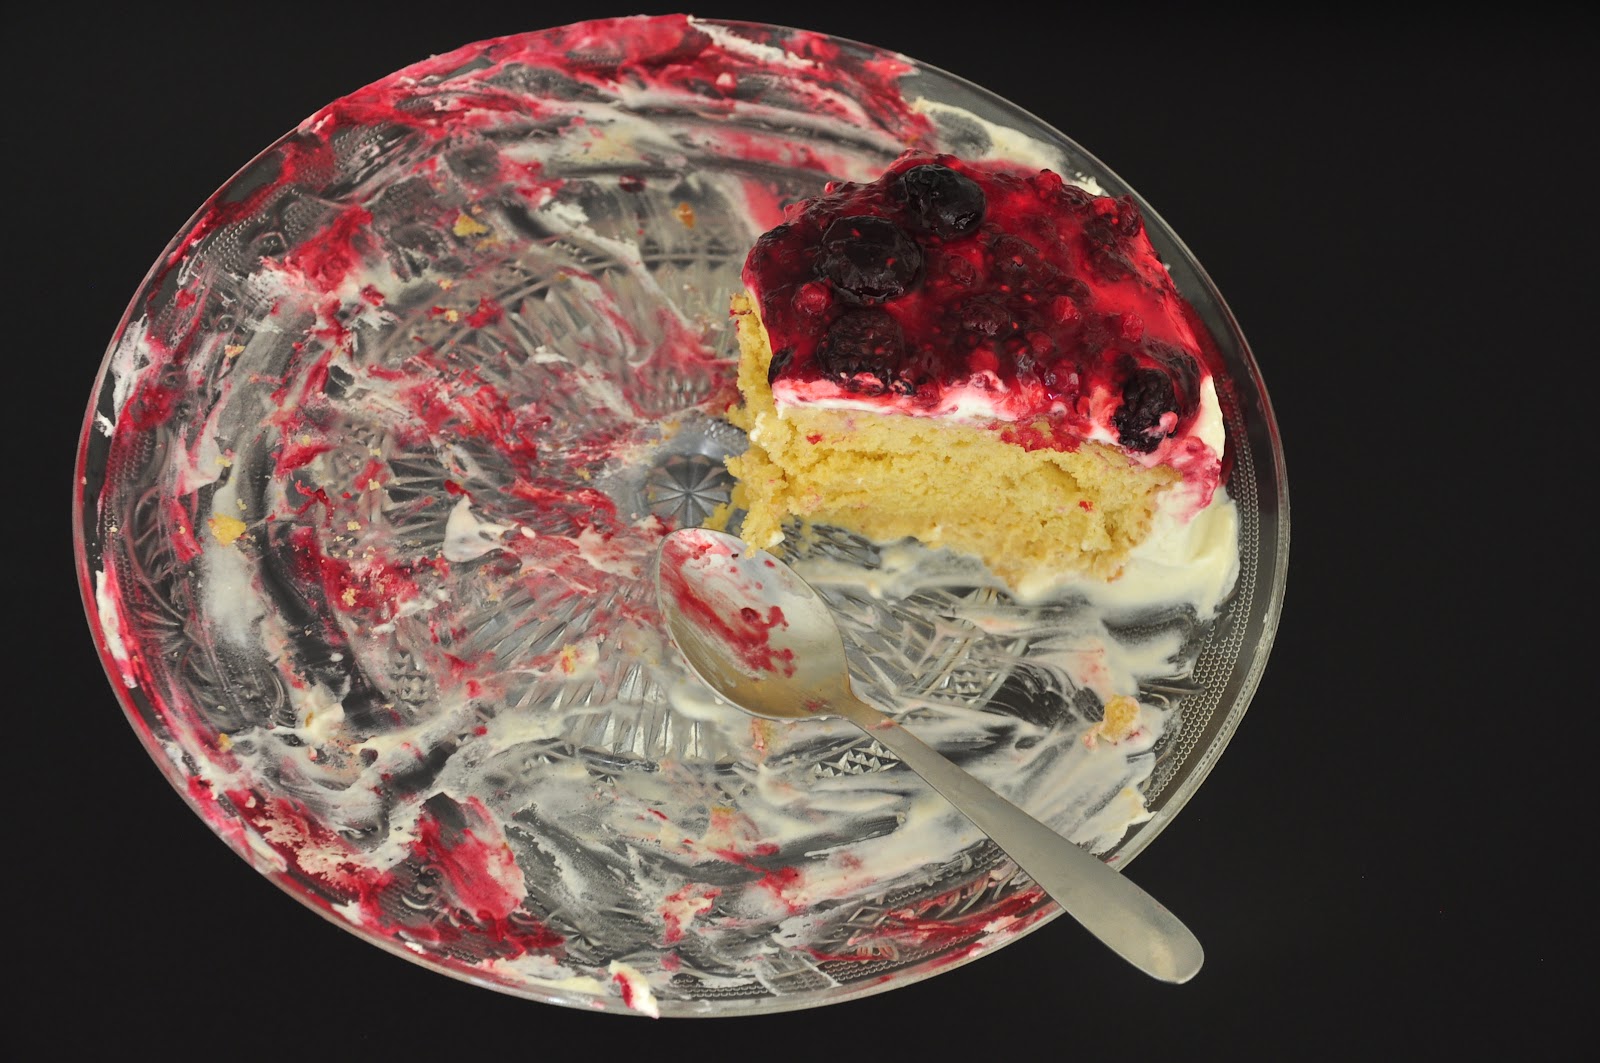
So, how is the cake, you ask.
To tell you the truth, in spite of all the praises heaped on the Tres Leches Cake, I made it with a bit of skepticism. I kept wondering if the soaking liquid would drown the cake and make it soggy, but I was wrong. It is amazing how the soaking liquid does not drench the cake. The cake stays firm, each slice retains its shape and yet each bite is very moist. The buttermilk gives it a slight tang, almost indiscernible, but still very much there. And then there is the whipped cream with the berry coulis...an explosion of flavours and texture in every bite.
I loved it so much that I can't wait to bake it again.
Oh, and in case if you are wondering what to do with the leftover evaporated milk, cream and condensed milk, make this kulfi which needs exactly the same ingredients.
Clearly, on some days, you can end up with a lot of dessert!

Thursday, February 24, 2011
Carrot Cake
It was night, not at all late by our standards - barely quarter past nine - but in the small town that we were spending a few days holidaying, it might as well have been midnight. Shops and restaurants were shut; even this cafe had its shutters halfway down. We were craving something sweet and while the dessert list boasted things such as Death By Chocolate, New York Cheesecake and Tiramisu, all that was left in the cafe when we walked in was a slice of carrot cake.

"Try mine, you will change your mind about carrot cake", he said confidently.
It was love at first bite and early next morning, we were back at the cafe, ready for more carrot cake. In fact, for the rest of our stay, we religiously dropped in at the cafe each morning for some carrot cake.

Before we left, I casually requested him for his carrot cake recipe, expecting a 'no' for an answer. I was aghast when he produced a print-out of the recipe.
Check it out forthis recipe is, without any exaggeration, the best carrot cake ever. Seriously. The best carrot cake ever!
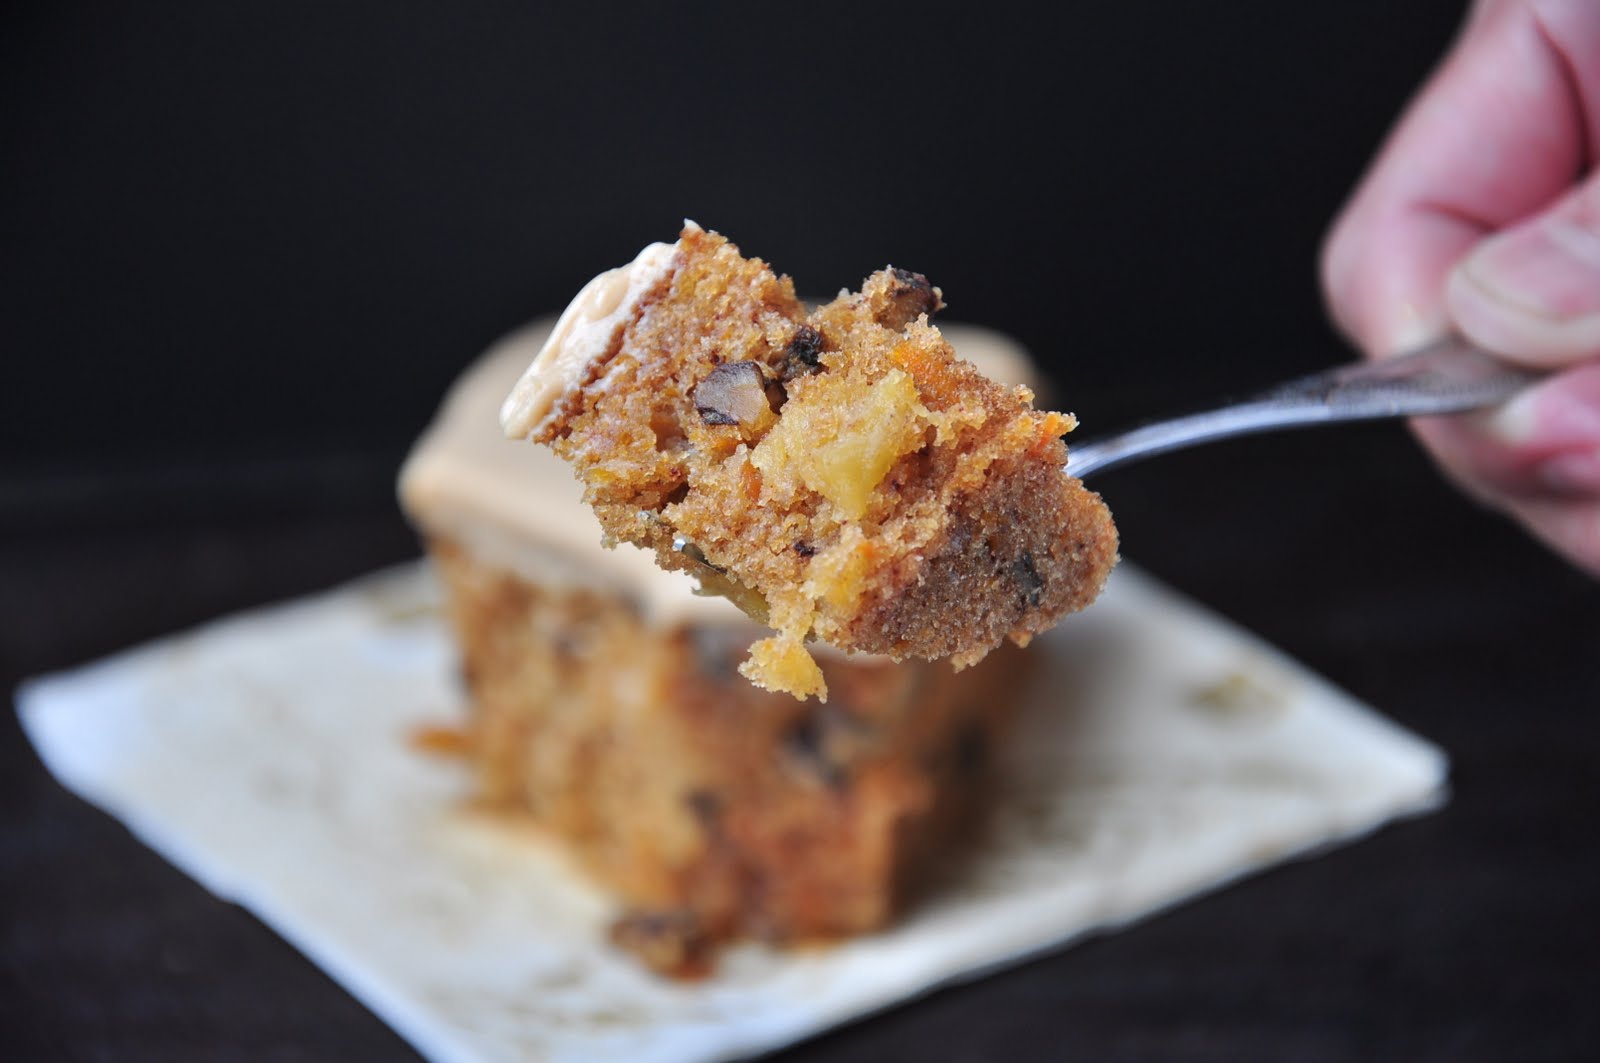

Edited to add... My apologies to anyone who lands on this page and doesn't find a recipe. Please email me for the recipe.
aquadaze@rediffmail.com
Tuesday, November 23, 2010
Apple Pie
It is also the one word that I will always associate with my daughter's paediatrician. A phenomenal doctor, she has often gone beyond the call of duty in attending to my daughter. And to think, I met her when I had gone to buy some toys for the little one! A serendipitous meeting but one that I will forever look back on with fondness and gratitude.
She is a constant source of inspiration with her boundless energy and insatiable appetite to learn new things. Cooking is just one of her many passions and this apple pie recipe is adapted from the one she shared with me.

It is quite different from the normal apple pie recipes where the apples slices are simply tossed in sugar and spices and then baked. In this particular recipe the apples slices are coated in a sauce and then baked in the crust.
Yes, it takes longer than the traditional recipes but the resulting pie is totally worth the effort!

Ingredients
for the crust:
All purpose flour: 2 cups
Unsalted butter: 2/3 cups + 2 tbsps/ 175 gms (original uses shortening)
Ice cold water: 4-6 tbsps
Salt: 1/4 tsp
Sugar: 2 tbsps
Method:
Cut the cold butter into cubes and chill again for about 15-20 mins. In a bowl, mix together the flour, sugar and the salt. Add in the butter and rub it into the flour with your fingertips till you get a grainy and crumbly mixture, with pea sized pices of butter.
Add in the water, a tablespoon at a time, till the mixture comes together and forms a dough.
I planned to make 2 five inch pies, and so I divided the dough into 4 equal balls, wrapped them individually in plastic wrap and refrigerated them for a couple of hours.
(The dough is otherwise sufficient for a single 9" pie)
for the filling:
Apples: 6 ( I used Granny Smith)
Brown Sugar: 1/2 cup
Rind of 1 orange and 1 lemon
Cinnamon powder: 1 tsp
Allspice/Nutmeg powder: 1/2 tsp
Orange juice: 1/2 cup
Juice of 1 lemon
Cornstarch: 1 tbsp
Butter: 1 tsp
Pecan nuts/walnuts: 1/3 cup
Method:
Peel and core the apples and cut them into thick slices.
Toss the slices in the sugar, the orange and lemon rinds, cinnamon and nutmeg powders and the lime juice and let them macerate for half an hour.
Then cook the apple slices till they just become limp. Once cooled, add the orange juice and the rum, if using, and refrigerate for at least 4 hours.
After the refrigeration time has elapsed, transfer the mixture into a strainer placed over a larger vessel in order to separate the juice from the apple slices. Allow to strain for about 15-20 mins.
Place the strained juice in a small saucepan and let simmer till syrup. Add the butter, stir and then add in the cornstarch stirring continuously till the juice thickens. Mix the apple slices and the chopped nuts into the sauce and allow to cool.
Assembling the pie:
Take one ball of the dough and on a lightly floured surface, roll it to a 7 inch circle, about 1/8" thick. Gently transfer it to a greased pie pan. Press firmly on the bottom and the sides of the pan, trimming off the excess with a pastry knife. Cover with a cling wrap and refrigerate.
To make a lattice patterned top, first cut out a parchment paper circle the size of your pie pan.
Roll out the dough and cut it into strips as such:

Transfer two strips vertically and horizontally on the parchment circle as such:

Place the next strip vertically and going over the horizontal strip as such:

Then put the next strip horizontally, tucking it under the first vertical strip and over the next vertical strip as such:

Continue placing the strips in a similar manner, going alternately under and over the other strips. The distance between the strips is entirely a matter of personal choice. I love to eat pie crust and hence I chose to have a tightly knit top:

Cover with another parchment circle and chill. Repeat for the second pie pan.
Pre heat the oven to 200 deg C.
Then put the filling into the pie pans. To seal the pie, simply invert the lattice patterned top over the filling and peel off the parchment paper. Seal the strips over the rim of the pie pan, brush the top with some melted butter and sprinkle some caster sugar.

Bake for about 30 - 35 mins or until the top is lightly browned and the juices start bubbling over.
Remove the pie from the oven and allow it to cool for a couple of hours before cutting it.

Serve with some vanilla ice cream or whipped cream; personally, I love to have just as it is without anything else coming in the way of the heavenly cinnamon and orange flavoured apple slices encrusted in a shortbread like flaky crust!
Rushing this pie off to Meeta's Monthly Mingle that Deeba is hosting this month.
Wednesday, November 10, 2010
Baklava
And this is a special occasion that warrants a really special treat. After all, this is the time of festival of lights Diwali, my favourite festival. But more importantly, this is my 150th post and in a neat coincidence, it is also the month my blog turns 2!
And as far as special treats go, there can be nothing more exotic or exquisite than baklava.

Believed to be of Turkish origin, baklava is an extremely popular sweet in Greece, Turkey and the Middle East. Layers of phyllo pastry stuffed with nuts and sweetened with some sugar syrup, baklava is one of my favourite sweets and was something that I had been craving for a long time now.
The recipes sounded easy enough but one thing held me back - the fear of working with phyllo dough.
As it turned out, my fears were completely misplaced. Phyllo dough is not quite the villain I had thought it was. In fact, I found it surprisingly easy to work with, making me wonder why I had been putting off making baklava for so long!
Don't let the long recipe put you off - making baklava is very, very easy. All that it needs is some pre-preparation and a single minded devotion to the task at hand.

Ingredients:
Phyllo dough: 24 sheets
Assorted nuts: 1.5 cups (I used pistachios, pecan nuts, hazelnuts and almonds)
Sugar: 1/4 cup
Cardamom powder: 1/2 tsp
Cinnamon powder: 1/2 tsp
Melted ghee (or butter): 1/3 cup
for the syrup:
Sugar: 3/4 cup
Honey: 1/4 cup
Water: 1 cup
Cinnamon stick: 2"long
Cardamom pods: 10 nos, slightly bruised
Lemon juice: 1.5 tbsp
Rose water: 2.5 tbsps
Method:
The one essential thing while making the baklava is to have all your pre-preparation completed in all respects before starting the assembly.
So, first thaw the phyllo dough as per the package instructions. Hastily and inadequately thawed sheets tend to stick to each other and tear. Once thawed, cover the sheets with a moist cheesecloth till you are ready to proceed with the assembly.
Next up, make the sugar syrup. In a saucepan, combine all the ingredients required for making the syrup and bring to a boil. Reduce the heat and simmer for a further 10 - 15 mins or until thick and well....syrupy. Cool completely.
While the sugar syrup simmers, process the nuts in the mixie to get a coarse powder. (If using a mix of nuts, process them separately). Toss the nuts with sugar, the cinnamon and cardamom powders. Set aside.
Melt the ghee/butter.
Brush the sides and bottom of your baking dish with the melted ghee.
Finally, cut the thawed phyllo sheets to fit your baking tray. With a sharp knife, you can cut all sheets in one go. I cut my sheets to fit a 8"x10" pan.
Now you are ready to assemble the baklava:
Place a sheet of the phyllo dough into the baking dish and brush it with some melted ghee. Repeat 7 times, making sure you brush the top of each sheet with melted ghee before placing
another sheet on top.
Spread 1/2 cup of the nut mixture on top.
Then place 4 sheets of phyllo dough on top of the nut mixture, brushing each sheet with the melted ghee.
Again spread 1/2 cup of the nut mixture.
Repeat with 4 sheets of phyllo dough and 1/2 cup of nuts once again.
Finally, place 8 sheets of phyllo dough on top of the nuts.
So, once assembled, the baklava will have:
8 sheets of phyllo at the bottom
1/2 cup of nuts
4 sheets of phyllo
1/2 cup of nuts
4 sheets of phyllo
1/2 cup of nuts
8 sheets of phyllo
Cut into squares or diamonds, making sure that you cut all the way through to the last sheet of the phyllo dough.
Bake at 180 degC or 350 degF for about 30 - 35 mins or until the top is evenly browned and crisp.
Pour the cooled sugar syrup over the baklava as soon as you take it out of the oven. Allow the baklava to soak the syrup for a minimum of 6-8 hours and preferably overnight; in fact it tastes the best when left undisturbed for 24 hours - that is if it lasts that long.
Utterly decadent, baklava is a sinful treat that is absolutely irrestible. Take it from someone who is very careful about what she eats, the baklava is so very addictive that you will find it difficult to stop at just one. This recipe yielded 20 pieces but at the rate at which they were disappearing, I actually had to hide a couple of pieces for taking pictures - the rest were gone that very day!
So go ahead and indulge!
Thursday, October 28, 2010
Sooji ka Halwa
For all our love of sweets, sooji ka halwa as we call it (or rava kesari as the husband calls it or goda sheera as I call it) is something that I had made very, very rarely in the first few years of marriage. Yes, I know how ridiculous it must sound. After all, sooji ka halwa is so easy to make, it tastes divine and almost everybody loves it.
The problem with sooji ka halwa is that though it is easy to make, it is as easy to mess up.
And, well my first attempt at making it was quite a disaster. I think the husband must have been quite scared off by that attempt for whenever I would offer to make sooji ka halwa, he would always come up with some alternatives. "Why don't you make some fruit salad instead? Or, how about some payasam? Or, let us get some ice cream." You get the drift, right?
"Hmmm...now this is going to be interesting!"
I don't think he missed eating sooji ka halwa. I mean, if he did, wouldn't he have asked my MIL to make whenever we went visiting or when she came over?
Then, my daughter had sooji ka halwa on a playdate and took a liking for it. When she started demanding that I make it at for her, the husband very amused.
A long call to mom and some detailed instructions later, I was all ready to tackle sooji ka halwa. Turned out that making sooji ka halwa was after all really very, very easy.

Here's how I make it:
Ingredients:
Semolina: 1 cup
Milk: 2 cups
Water: 1/2 cup
Ghee/Clarified butter: 3 tbsps + 1 tbsp
Sugar: 3/4 cup (you could also increase it to 1 cup if you like it sweeter, I use 3/4 cup)
Cardamom powder made from crushing about 8-10 cardamom pods)
Salt: a pinch
optional:
some raisins, cashewnuts and almonds
Banana: 1 medium sized
Method:
In a small vessel, combine the milk and the water, toss in the raisins, if using, and bring it to a boil.
While the liquid boils, pour the semolina into a wok and start roasting it. Once it is warmed, say 2 minutes later, add 3 tbsps ghee to it. Continue to stir - and stir constantly (a little inattention and the semolina can burn) and roast till the semolina turns light brown in colour and emits a wonderful aroma.
(My mom says that when the aroma can be detected from a distance is when the semolina is roasted right).
Once the liquid comes to a boil, slowly pour it into the roasted semolina, stirring constantly. (Careful when pouring as a plume of steam rises up when the milk hits the semolina in the pan).
Stir well and flatten lumps, if any, with the back of the spoon. Then cover the pan and steam on a low heat for about 4-5 minutes.
Stir again, scrapping off any semolina stuck to the bottom of the pan. Then add the sugar, cardamom and nutmeg powders and a pinch of salt. Cover and steam again for another 5 minutes.
Then add in the mashed banana, if using, and give it a good stir. Finally, add a tbsp of ghee, mix well and serve hot.
"Don't feed me baby food!"
I tasted the halwa and did a little celebration dance in the kitchen. It was delicious! I expected him to similarly exult, but he had was a puzzled look on his face. He tasted it and then tasted it again. “Bananas?” he frowned. “Oh I get it. One of your 'make everything healthy – sneak in fruits and vegetables wherever possible' experiments!”
“Experiment? What are you saying....wait a minute....haven't you had sooji ka halwa with bananas before?"
Turned out that indeed he had never had it. Yeah, go figure that!
"Whaaaattttt.....you are not really serious, are you?"
Even with the bananas, he did relish the sooji ka halwa but halfway through his serving, there came on his face a look of complete disbelief and a mild disgust. He was looking at my bowl as if a cockroach had fallen into the bowl! But the only thing that was there in my bowl was some mango pickle. He simply couldn’t believe what he was seeing.....halwa with pickle? I was equally perplexed at his disbelief. I mean how can anyone not like sooji ka halwa with mango pickle?

It is without doubt the best way of enjoying the halwa – in a spoonful, there is a medley of flavours – the sweet halwa, the sour and spicy pickle and the gentle whiff of bananas – all coming together in a taste experience that is tongue tickling and unlike any other.
So, the next time you make sooji ka halwa, forget garnishing it with almonds and cashewnuts. Use some pickle instead. You’ll love it, I promise.
This is my entry to Sharmi's CFK - Festive Foods that Suma is hosting this month.
Saturday, October 16, 2010
Tiramisu
Now, I would love to claim that this recipe was shared by an Italian chef or that it is the authentic recipe of making the tiramisu.
But having gone to the country where the tiramisu was invented and having eaten it almost every single day, I can definitely aver that this recipe results in a tiramisu that is as good as if not better (yes, I actually said that!) than the ones we ate in Italy.

I have tried numerous recipes for making tiramisu but the one I made from Cooking for Engineers makes the most fantastic tiramisu I've ever eaten. First of all, it doesn't use raw eggs, instead the egg yolks are cooked into a custard.
Light yet delectably creamy, it is has a perfect melt in your mouth feel. But most importantly, it is not cloyingly sweet and the balance of flavour between the coffee and the alcohol is just right.
I have made a few modifications to the original recipe; here's my version.
Ingredients:
for the zabaglione:
Egg yolks: 4
Sugar: 1/2 cup + 2 tbsps
Marsala wine: 1/2 cup
Mascarpone cheese: 500 gms
Heavy cream: 250 ml
for the dipping mixture
Espresso: 1 1/4 cup
Marsala wine: 3 tbsps
Ladyfinger/savoiardi cookies
Cocoa powder: 1/4 cup
Method:
Whisk together the egg yolks and the sugar till pale and lemony in colour. Add in the Marsala wine and whisk a few minutes more.
While you are whisking the yolks, bring some water to boil in a saucepan (this saucepan should be a size smaller than the one you are whisking the egg yolks in. I fill the saucepan halfway through with water).
Once the water comes to a boil, reduce the flame so that the water is barely simmering and then set the bowl containing the whisked yolks on top and stir continuously till the mixture starts to thicken and bubble around the edges. Set aside and let it cool completely.
(the first time I did this, I ended up with something that looked like crumbed paneer - which meant that my egg mixture had started to cook. So now, whenever I make the egg custard, I keep a deep plate filled with chilled water - the minute I think the mixture is starting to overheat, I plonk the bowl into the chilled water to prevent the eggs from cooking).
Next, whip the cream to get stiff peaks. Also, beat the mascarpone cheese till it is smooth. Then pour the zabaglione into the cheese and beat to get a homogenous mixture. Fold in the whipped cream into the cheese mixture in 3 quick additions.
Assembling the tiramisu:
Mix together the espresso and the marsala. (If you find the espresso too strong for your liking, dilute it with some warm water but don't use sugar to counter the bitterness. Sugar in the espresso is an absolute no - no).
I use my 9" springform pan for assembling the tiramisu.
Working quickly, dip the ladyfinger cookies in the espesso mixture and lay them in a single layer over the bottom of the pan. I dip only one side - the plain side - of the cookies in the espresso and place them sugar side up in the pan. These cookies are very delicate and so don't dip them for longer than a second in the espresso mixture.
Spoon half the cream mixture over the cookies. Prepare another layer in a similar fashion, cover the pan with a cling wrap and refrigerate for at least 4-6 hours (preferably, refrigerate overnight).
Just before unmolding and serving, dust the top with cocoa powder.
Saturday, August 7, 2010
Strawberry Mirror Cake
However, when it comes to this Strawberry Mirror Cake, the superlative is difficult to avoid. But I don't want to hazard claiming that this is the best dessert ever and so I will just stop at saying that this is the best dessert that I can whip up. Not only is it gorgeous and elegant looking, it tastes better than it looks. Go on, drool over that slice.....

A few years ago, we were invited for dinner at a friend's place. Now, I am a dessert-first kind of person but I refused the dessert that day. Because for dessert was (a very delicious looking) strawberry mousse and mousse normally has raw eggs in it and I don't eat raw eggs.
"This doesn't have any eggs. In fact, it is made from - you won't believe it - ice cream and jelly!"
The mousse was fantastic and I just had to have the recipe. However, my recipe request was firmly turned down. "No sharing of recipes is going to happen," she said.
What friends don't share, Google happily does. I wasted no time in surfing the net, tried a few recipes; the one I stumbled upon at the OChef website tasted exactly like the one she had made.
A very easy dessert to make, the mock Strawberry Bavarian as it appears on OChef is very versatile too. I've made it in cherry and raspberry flavours with equally delicious results.

So, where does the Strawberry Mirror Cake fit into all this ramble, you might wonder. I am coming to it....
When I started blogging, I came across this group that calls itself 'the Daring Bakers'. One day, while browsing through one such intrepid blogger Sunita's blog, I came across the stunning Strawberry Mirror Cake and borrowed the basic presentation idea there to make mine.
My Strawberry Mirror Cake is a fusion of 3 different recipes. It might, by the look and sound of it, seem complicated but I can assure you that it is not so. And the end result is more than worth all the effort, both in terms of the way it looks and tastes.
I hope rather long recipe doesn't put you off - in any case, there are only 4 main steps; what you need to do is simply organise the steps.
Here's how I make it:
I start by baking the sponge cake.
Ingredients:
Eggs: 4
Sugar: 120 gms
Cake flour: 100 gms
Vanilla essence: 1 tsp
Butter: 65 gms, melted
Method:
Pre-heat the oven to 175 deg C.
Cream together the eggs and sugar till they are pale, light and creamy and the mixture falls in ribbons, about 10 mins. Sprinkle the flour and fold it into the egg sugar mixture with the help of a spatula. I do this in 3 additions. Beat this egg-sugar-flour mixture till it falls in ribbons again, about 1o - 12 mins. Finally, fold in the melted butter.
Bake in a greased 8" round cake pan for about 30-35 minutes or till a skewer inserted comes out clean.
Leave on the wire rack till it cools completely. Once cool, slice into 2.
While the cake bakes, set about preparing the strawberry juice for the mirror and for moistening the cake.
Ingredients:
Strawberries: 680 gms
Sugar: 1 cup
Water: 1 cup
Lime juice: 1/2 tsp
Method:
Wash and hull the strawberries. Mash them with your hands or with the back of a spoon; sprinkle sugar over them and drizzle the lime juice. Set aside for about 15-20 mins so that the juices start to flow.
Place over low heat, add the water and simmer for about 10 mins. Strain through a fine sieve or preferably a cheesecloth and let drain for about 15-20 mins.
Reserve 1.5 cups for the mirror and use the rest for moistening the cake.
Now that the pre-preparation is through, move on to making the mock strawberry bavarian
Ingredients:
Strawberry-flavored gelatin: 7.5 ounces/225 gms
Boiling water: 2 1/2 cups
Sour cream: 1 1/4 cup
Vanilla ice cream : 600 ml (the original recipe uses strawberry ice cream)
Lemon juice: 1 1/4 tbsp
Strawberries: 250 gms, chopped
A large bowl of ice
Method:
Place the jelly in a bowl and add the boiling water to it. Stir till the crystals dissolve. To this, add the sour cream and whisk until smooth.
Next add in the ice cream and mix until the ice cream has melted. Squeeze in the lemon juice and add the chopped strawberries.
Place the vessel over a bowl of ice and stir till the mixture just starts to thicken. Once that happens, take the bowl off the ice (don't throw away the ice, you are going to need it for the mirror) and start to assemble the gateau:
In a 10" springform pan, place one half of the cake. Drizzle some strawberry juice to moisten the cake. Layer half of the bavarian on top of the cake and refrigerate for 15 mins.
Repeat with the other layer of the cake and refrigerate for about 30 minutes.
This is the last step, making the strawberry mirror.
Ingredients:
Strawberry juice: 1.5 cups (yes, the one we set aside earlier)
Lemon juice: 1 tsp
Kirsh: 1 tbsp (I omit this)
Water: 1 tbsp (I use 2 tbsps)
Unflavoured gelatin: 1 tbsp
A few drops red food colouring (I omit this)
Method:
Place the lemon juice and water in a bowl. Sprinkle gelatin over the mixture and aside till the gelatin becomes soft and spongy.
Meanwhile, bring the juice to a simmer and pour it over the gelatin mixture. Stir to dissolve the gelatin. Add the colouring, if using.
Now place the mixture over a bowl of ice and stir till the mixture is syrupy and starts to thicken. As soon as it starts to thicken, remove the bowl from the ice. Scoop off any bubbles that may have formed while stirring and pour it over the top layer of the bavarian.
Refrigerate until the jelly sets.
To unmold, blow your hairdryer (YES! ) on its lowest setting all around the outside of the springform pan (you could even use a warm towel and run that on the outside of the pan) Then, run a spatula around the edge of the jelly to gently separate it from the sides of the pan - this step is most critical as the mirror could tear if it is stuck to the pan when you unlatch it.
The Strawberry Mirror Cake is a fitting end to a dinner party and so I am taking it along to Nupur's Potluck Party (the theme for this month's BB6).
Sunday, March 7, 2010
Pears in Red Wine
But when you buy a huge villa which happens to be in a foreign country whose language you are not fluent at and moreover, when the said villa is dilapidated and has been abandoned for a long time and you set about remodelling and restoring it, the labour and the love (and the money) it demands from you multiplies many times over.
Under The Tuscan Sun, the book club's choice this month, chronicles the author Frances Mayes' first four years in Italy. At its heart is the villa Bramasole that she and her partner, Ed purchase. Though it is completely run down from years of neglect, they dream of turning it into their home. With both of them working full-time in San Francisco, the going is very tough. Amid trips back and forth every summer and winter, they have to wade their way through a labyrinth of work: from negotiations with contractors, liaising with the workers through faxes and telephones to finally rolling up their sleeves to get the work done in time to host a friend's wedding, as a reader, you really do feel very impressed at their effort and commitment in restoring Bramasole's splendour.
However, after a point, reading about the work in progress (or the lack of progress) does get tedious. Fortunately, her memoirs do go beyond the villa renovation - as she travels into the area around Cortona, she paints a very beautiful and vivid picture of the region and delves into the history and culture of Tuscany. Sadly, her impressions of Italians and their life cling to the oft repeated cliches and while it is very interesting to read about the Etruscan civilisation, a different and scarcely known aspect of Italian history, after a point in time, the repeated references to the Etruscans made it seem like she was plain obsessed with them.
I started reading the book with a lot of enthusiasm because going to Tuscany has been on my wish list for long. However, towards the last third of the book, I found it quite laborious to plod through the pages. And had it not been a book club read, I am certain I would have stopped reading it!
Her prose is beautiful, lyrical almost and her philosophical introspections are definitely thought provoking. My favourite parts of the book were where she takes the reader through the markets in Cortona, lined with freshly picked fruit and vegetables and when she dips bread into a bowl olive oil extracted from olive plucked out of their land. The bounty of the land and the sheer labour it takes to put something on the table really shine through in these parts of the book.
Which brings me to the food: plenty and more of it, till you would almost get indigestion and heartburn just from reading! The recipes, earthy and simple to make, are divided into summer and winter in keeping with the seasonality of ingredients.

Poaching pears in red wine is something I have been wanting to do for a long time. I didn't use the recipe in the book as I didn't quite fancy the idea of using currants with the pears. Instead I picked up a few ideas from a couple of websites to come up with this method.
The red wine poached pears look stunning and are ridiculously easy to make. Make these a day or two ahead of time, so that the pears can absorb all the flavours from the spices; also the colour intensifies with time.
Ingredients:
Pears: 2
Red wine*: 400 ml (I used merlot, but having made these, I would highly recommend a marsala)
Sugar: 1/2 cup
Cinnamon: a 2" piece
Ginger: 1" piece, julienned
Star anise: 1
Crushed peppercorn: 1/2 tsp
Vanilla pod: 1, split lengthwise
Lemon zest: 1 tsp
(*for those who don't use alcohol, substitute the wine with grape juice and cranberry juice in the ratio of 2:1 and add a couple of tbsps of balsamic vinegar when making the syrup).

Put the red wine, sugar and all the spices into a saucepan and bring to a boil. Simmer till the sugar dissolves.
Meanwhile, peel the pears, cut off a small disc from the bottom so that the pears can stand upright. Do leave the stalks on.
Place the pears upright into the wine; they should be completely submerged into the wine. Simmer for a further 20-30 minutes or until they are cooked through, such that a toothpick inserted into the thickest part of the pear goes through easily.
Let the pears cool and then refrigerate them. Just before serving, remove the pears from the liquid, then reduce the liquid till it reaches a syrupy consistency.
Slice the pears, drizzle the syrup over them and serve with some vanilla ice cream.
Here's what the other book clubbers made:
Sweatha made Basil Mint Sorbet, Ann made a pizza with onion confit, grilled sausage and peppers and Simran made Caponata.
Next month, we are reading a chic-lit, Can You Keep a Secret by Sophie Kinsella. Drop a line to Simran - bombayfoodie(at)gmail(dot)com if you'd like to join us.
Thursday, January 7, 2010
Lost in Pronunciation and Dulce de Leche Flan
Dulce de leche flan is one of the most decadent desserts I have ever eaten. It has a silky, rich, creamy, melt in your mouth texture..... Yes, talk about singing paeans of praise! But then once you've eaten a dulce de leche flan, you will agree that it is deserving of all those adjectives that I have written.
No, it is not really a caramel custard, though it quite looks like one; the complex toffee and caramel flavour of this flan will drive you to...well, raptures of delight!
Undoubtedly, this is one of my favourite desserts - pity I got to know of this dessert a mere 3 years ago!
Rewind to 2006, I was in the kitchen making kulfi while my helper looked over very intently.
What are you making with the condensed milk, she asked.
Kulfi, I told her and proceeded to explain what kulfi was all about.
Even I know a very delicious dessert with condensed milk, she told me. Lichee flan, it is called she said.
Now, I just love litchis (litchi/ lychee depending on where you are and how you pronounce it) so a litchi flan did sound nice.
Then one day when we were in the supermarket, my eye fell on some really luscious litchis and thought of asking her to make the flan. Pick up what you need to make your litchi flan, I told her.
So she went around and came back with condensed milk, evaporated milk and eggs. No litchis though.
How on earth are you going to make litchi flan without picking up any litchis, I demanded.
She looked at me as if I were talking gibberish. But litchi flan does not need any litchis, she explained patiently.
Duh? Just what exactly are you making, I asked her again.
Litchi flan. It is like the ummm.....caramel pudding you make.
Huh? I was completely baffled. Litchi flan without litchis? What exactly are you making, I asked her exasperatedly. Can you spell it for me please?
And so, she typed on her phone : Leche flan.
Litchi flan, she said.
Ah ha! Laychay flan, I muttered.

I never got around to noting down her recipe. And so when I made Dulce de Leche flan, I surfed the net and landed on somes recipe that I liked; I have mixed n matched several to finally come up with this one.
Ingredients:
for the custard
Dulce de Leche - 1 tin (here'e how you make the dulce de leche)
Milk - 500 ml
4 eggs
2 egg yolks
zest of half a lemon - don't skip this, it adds a lovely flavour to the flan
1 small vanilla pod or 1 tsp vanilla extract (this time, I used vanilla extract as I didn't have the pod; I do prefer using the vanilla pod)
for the caramel:
125 gms sugar
75 ml water
Method:
First, make the caramel: add the water and the sugar together in a pan and allow the sugar to melt whilst gently stirring. Then let it caramelise; turn off the gas when it reaches a deep amber colour.
Pour the caramel into a flan pan and swirl it around to coat the base and the sides of the pan. (I used a 9" cake pan).
Split the vanilla pod length-wise and scrape the seeds. Scald the milk in a saucepan and add the vanilla seeds and pod* to the milk. Slowly add the dulce de leche to the milk, stirring constantly till the dulce de leche is dissolved. Once the dulce de leche is dissolved, turn off the gas and allow the mixture to cool a bit. You will need to stir it a bit to avoid the skin from forming on top of the milk mixture.
Lightly beat together all the eggs and the lemon rind* and add it to the cooled milk - dulce de leche mixture. Mix well.
(* if you are using vanilla extract, then whisk it with the eggs instead of adding it to the milk).
Discard the pod and pour the custard into the prepared flan pan. If there are too many bubbles in your mixture, then scoop these off with a spoon.
Pre-heat the oven at 160 deg C for 10 mins. You will need to bake the flan in a water bath, so while you are pre heating the oven, set some water to boil.
Place your flan pan in a larger baking tray and pour the just boiled water into the larger baking tray; the water should come 2/3 up the side of the flan pan.
Bake for about 40 mins at 160 deg C or until a skewer inserted in the centre comes out clean. Else, keep baking in 5 min increments.
Cool your flan in a water bath till it comes to room temperature, then chill it for at least 3 hours. To serve, loosen the edges of the flan with a knife and then invert it on your serving dish. Pour all the caramel over the flan.
You could serve it right away, but I prefer to chill my flan overnight; it really allows all the flavours to infuse well.
Oh, and make sure you pronounce it as dulsay the laychay flan to avoid any confusion!
Monday, July 13, 2009
Mango Sago Dessert
If you, like me, still have room for some more mango, here's something you must try.

Called simply Chilled Mango Juice with Sago and Pomelo, this is an extremely popular Chinese dessert. I was so blown away the first time I had it at a local restaurant here - a little like mango milkshake but with a slight tart and pleasantly bitter taste from the pomelo - that I couldn't wait to make it at home. And eversince I've made this many many times!

The best part about this? Cool and sweet, this fulfils my sweet cravings at the end of a meal without the use of too much sugar.
Ingredients
Mangoes - 2 (don't use alphonso you need mangoes that have a slightly tart taste; I used Baganpalli)
Sago - 3 tbsps
Low Fat Milk - 1/2 cup
Pomelo - 1 (you can replace this with any citrus fruit if you don't get pomelo)
Sugar - 2 tsps
Method:
Soak the sago in 1/2 cup of water for about 4-6 hrs at the end of which drain and set aside.
Boil 1.5 cups of water and add to the boiling water. Cook for about 10 mins by which time the sago will turn translucent. Turn off the heat, cover and leave for about 10 mins, then drain the sago and let cool.
Peel and chop the mangoes, grind it to a pulp with remaining cup of milk .
Finally, just assemble everything - the mango pulp, pomelo juice, sago and the pomelo bits - together in a jar, stir, add some ice cubes and serve!!
Monday, July 6, 2009
Strawberries and (not) Cream
+cream.JPG)
Roger Federer regained his Wimbledon crown and won 15 Grand Slam titles. Apparently, it was a thrilling match. I say 'apparently' because it was a match I didn't watch. You see after Federer lost the first set and was down 2-6 in the second set tie breaker, I didn't have the stomach to watch anymore, certain as I was that he was going to lose in straight sets!
Around 4 in the morning, I tiptoed into the living room and switched on the TV, expecting to hear my belief confirmed - imagine how thrilled I was to find just the opposite!
Fitting therefore that I serve some Strawberries and Cream today(my version is without cream though), in true Wimbledon tradition!

It is said that every year almost - hold your breath - 27,000 kilos of strawberries and 7000 litres of cream are consumed during the Championship fortnight (source - BBC: BluePeter sports section and http://www.wimbledonvisitor.com/)
There was a time when we would happily tuck in strawberries and mangoes with cream, but these days, I try making my desserts as healthy as they possibly can get and so I've been using hung yogurt in place of cream - and we absolutely don't feel the difference, neither in terms of the texture or the taste.

Strawberries and (not) Cream
Ingredients:
Strawberries - 20, cut into half
Yoghurt - 500 ml, hung for about 6-8 hrs
Icing Sugar - 3 tbsps (more or less depending on how sour the yogurt is)
Caster Sugar - 2 tsps
Vanilla essence - 1/4 tsp
Method:
Macerate the strawberries in the caster sugar for about 15 mins.
Whip the hung yogurt, the icing sugar and the vanilla essence for about 5-10 mins until light and fluffy.
Place a spoonful of the strawberries in a bowl and pipe the whipped yogurt on top, layer with another spoon of the strawberries and finish off with the whipped yoghurt. Drizzle some of the strawberry juice on top.
Delicious, light and healthy! Go ahead, indulge!!
This is also my entry to ClickJuly 2009: Bi-Color hosted by Jugalbandi.


