Monday, August 13, 2012
Tres Leches Cake
I am, by nature, a procrastinator. My parents had nicknamed me 'the Queen of all things last minute'. It is not hard to see why. When in school, the homework would be done early in the morning between large gulps of milk, in college, projects would be finished by burning the proverbial midnight oil. Even today, I tend to fill out forms minutes before they need to be actually submitted. If you need any further proof of just how I tend to procrastinate, check out my entries to various food blog events...most of them are after the submission date.
When it comes to making desserts, however, I am the exact opposite. I will usually start making desserts soon after I have read the recipes - before I have even ascertained that I have all the ingredients that a recipe calls for.
So, why it took me almost 5 years to make the Tres Leches Cake is beyond me.
I first heard of, or rather read about, the Tres Leches Cake when I was looking up recipes for the Dulce de Leche flan. 'Pastel de Tres Leches' appeared as a related recipe on one of the many sites I visited.
I was intrigued by the Tres Leches Cake. The entire concept of mixing together and pouring a combination of 3 types of milk, and hence the name which translated means 3 milks cake, (condensed milk, evaporated milk and fresh cream) over a sponge cake fascinated me. Ever since I read about the cake, I made it many times....in my head. Sometimes, I would top the cake with mangoes. Other times, it would be peaches or lychees.
But I always stopped short of actually making the cake. I think it was fear that the milk mixture, devoid of any flavouring, would make the cake taste and smell very milky.
A couple of weeks ago, I came across a recipe that recommended using buttermilk. I loved the idea of using buttermilk, the tang from the buttermilk would be perfect to counter the 'milkiness' of condensed milk and evaporated milk.
I wasted no more time in making the Tres Leches Cake.

Tres Leches Cake
for the cake (recipe from the Pioneer Woman)
Eggs: 5, separated (mine weighed 51 gms)
Sugar: 1 cup
Milk: 1/3 cup
Vanilla essence: 1 1/2 tsp
All purpose flour: 1 cup
Cornflour: 1 tbsp
Baking powder : 1 1/2 tsp
Salt: 1/4 tsp
Oil: 1 tbsp
Method:
Sift together the flour, cornflour, baking powder and salt.
Whip the egg whites till you get soft peaks. Add 1/4 cup of sugar and whip till you get stiff peaks and set aside.
Beat together the egg yolks and the remaining 3/4 cup sugar till pale and creamy; the mixture should fall in ribbons when the beaters are lifted from the mixture.
Add the milk and vanilla essence.
Next, fold in the flour with a spatula till just combined.
Fold in the egg whites in 3 batches, and then add the oil and mix.
Pre-heat the oven to 350 deg F or 180 deg C. Grease and line a 10" round cake pan (I used a 9" cake pan, but on hindsight, I feel a 10" cake pan will be better; the original recipe uses a 9" x 13" pan).
Bake for 30-35 mins, or until a skewer inserted comes out clean. Cool the cake and then poke it all over right down to the bottom of the cake (at 1/2" intervals) with the skewer.
for the soaking liquid (adapted from Un Dejeuner de Soleil):
Evaporated milk: 1 1/2 cup
Condensed milk: 1 1/4 cup
Buttermilk: 3/4 cup
Brandy: 1 1/2 tbsps, optional
Vanilla pod: 1 small, or vanilla essence: 1 tsp
Method:
Slit the vanilla pod length-wise and scrape the seeds. Add the pod and the seeds to the evaporated milk and heat it till bubbles start to form around the edges of the evaporated milk. Cool and then add the condensed milk, buttermilk and brandy, if using.
Return the cake to the cake pan - I used a 9 1/2" springform pan, which made it easy for me to later transfer the cake on the cake platter - and slowly pour the milk over the cake starting at the edges and moving to the centre. I poured the milk in 3 batches, at an interval of 5 minutes between each addition.
Cover with clingfilm and refrigerate for at least 3-4 hours in order to allow the cake to absorb all the liquid.
for the topping:
Whipping cream: 300 ml
Icing sugar: to taste
Vanilla essence: 1/2 tsp
Frozen mixed berries: 450 gms
Sugar: 1/2 cup
Lemon juice: 1 tbsp
Cornflour: 2 tbsp mixed in a little water
Whip the cream with the icing sugar and essence till you get soft peaks.
Mix together the berries with the sugar and lemon juice and set aside for 30 minutes. Then, cook over a low heat till the berries soften and the juices start bubbling. Add the cornflour and stir continuously till the sauce thickens. Cool to room temperature.
Transfer the cake on a serving dish and spread the whipped cream over the top and sides of the cake and spoon the berry coulis over the top.

I made the Tres Leches Cake for a dinner party and it was devoured. Yes, devoured. There is no other word for it. This is all I was left with the next day; I barely manage to get a decent slice for a picture.
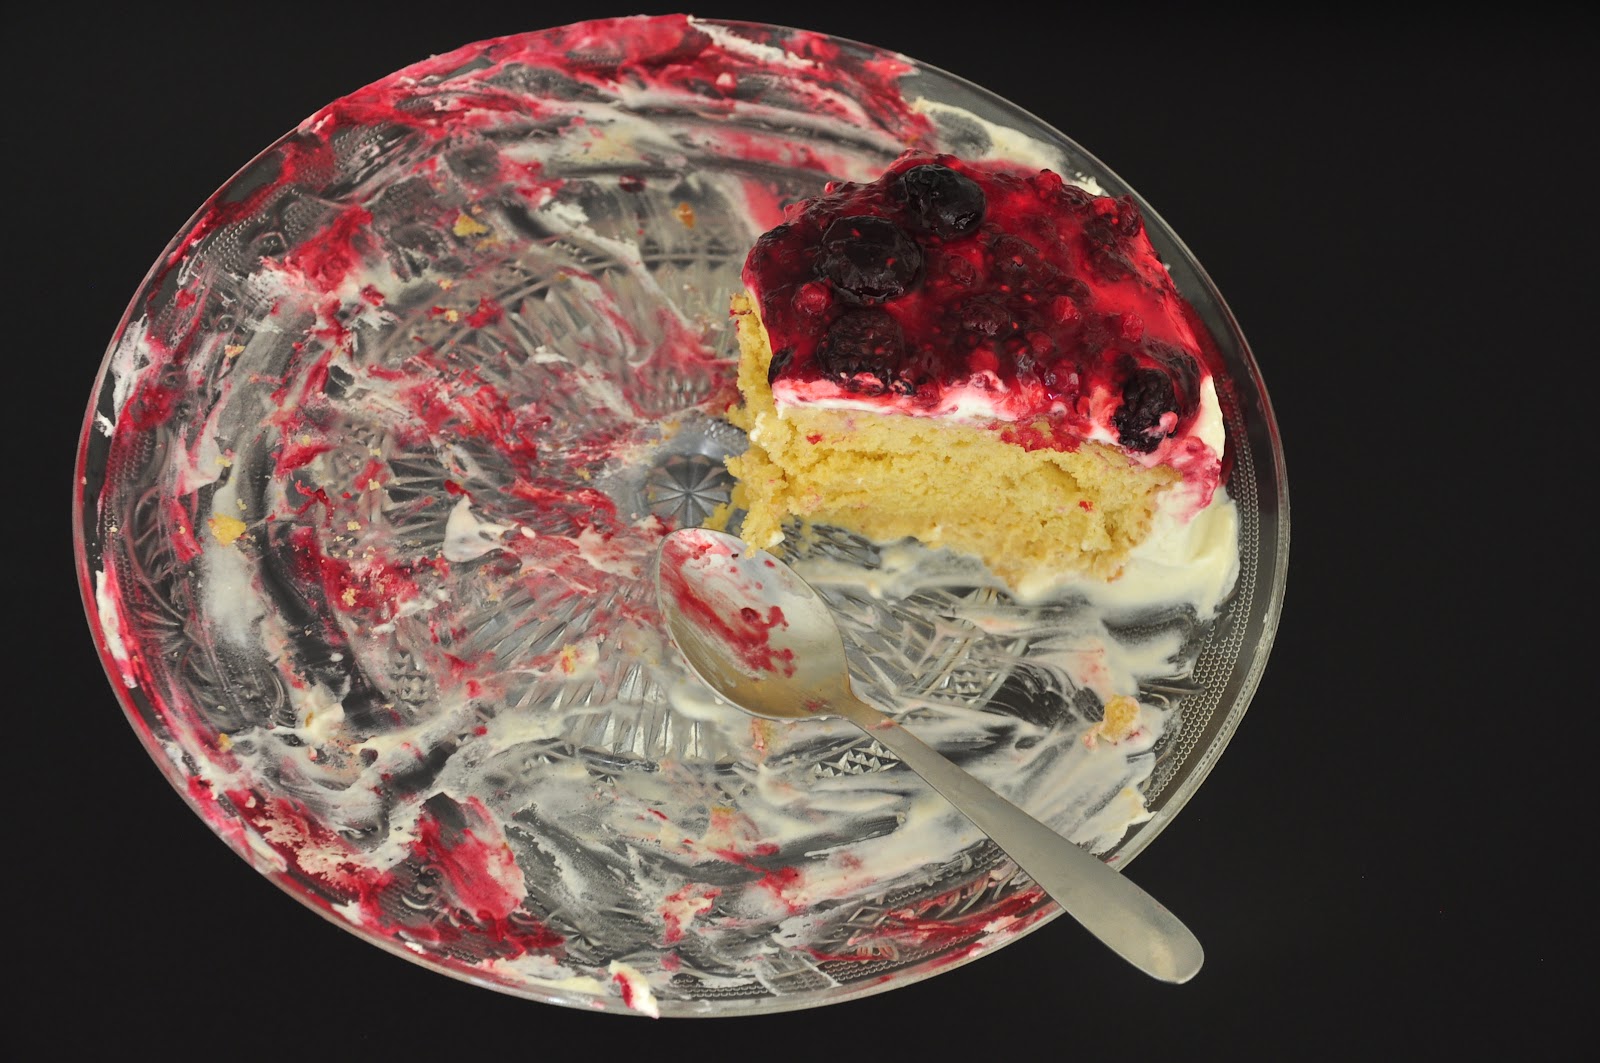
So, how is the cake, you ask.
To tell you the truth, in spite of all the praises heaped on the Tres Leches Cake, I made it with a bit of skepticism. I kept wondering if the soaking liquid would drown the cake and make it soggy, but I was wrong. It is amazing how the soaking liquid does not drench the cake. The cake stays firm, each slice retains its shape and yet each bite is very moist. The buttermilk gives it a slight tang, almost indiscernible, but still very much there. And then there is the whipped cream with the berry coulis...an explosion of flavours and texture in every bite.
I loved it so much that I can't wait to bake it again.
Oh, and in case if you are wondering what to do with the leftover evaporated milk, cream and condensed milk, make this kulfi which needs exactly the same ingredients.
Clearly, on some days, you can end up with a lot of dessert!

Friday, May 11, 2012
Amrakhand
This is a small part of an e-mail I wrote 2 years ago, soon after I wrote this post, to a few of my very special childhood friends. We were a group of 3 girls and 2 boys and their friendship was one of the best things that ever happened to me.
Do you remember our summer holidays? The months of April and May when the sun shone with all its might and we roamed aimlessly around the neighbourhood, barefoot, with nary a care in the world.
Except, of course, our exam results.
Tell me, do you remember those little white lies we told each other of how well we had done in our exams, only to sheepishly hang our heads in shame when our mothers got together and bemoaned our dismal results?
Do you remember the games we used to play? I know how that sounds - games we played - but back then, it simply meant lagori, dabba ice-spice, chor police, dodge ball, carrom, statue or colour - colour, to name some. We could play all day long; in fact, the day isn't just long enough to accomodate all our games, we used to complain!
Of course, there were times when we would fight. Bitterly. Loudly. Physically. We would take sides, split into groups, and declare a cold war.....only to reconcile a few hours later, and start playing again, as if the fight had never happened. Playing, fighting, reconciling - it was all so easy then.
Do you remember us glugging down glasses of cold panha, kokum sherbet or Rasna after playing in the hot sun, and egging you M, to burp? Louder, louder, we used chant. And you would oblige us every single time.
We would all collapse into giggles. We would laugh so hard that we would get hiccups. So we'd drink some more juice to get rid of the hiccups, and start with the 'burp' game again.
Do you remember landing up at odd hours at each others' houses, demanding to be fed? With our mouths stuffed with food, and without any regard for the feelings of the aunty feeding us, we would start loud arguments about how our respective mom was the 'world's best cook'.
Do you remember the races we had? No, we never had running or cycling races. We competed to find who could eat a ripe mango the fastest. We would soften the mango between our fingers and suck on it, the juice dripping down on our already stained and muddy clothes. K, your 'white' petticoats would take quite a beating! We never savoured the taste then, all we wanted was to eat as fast as possible.
And, do you remember looking up at the skies towards the end of May when the monsoon clouds would start to gather? We couldn't wait to get wet in the first monsoon showers, and yet the first showers would always sadden us a little. For with the first showers also came the realisation that our schools would reopen soon, and we would have to wait a whole year for the fun to begin again.
"Oh what a vacation we 've had", we would say over and over again. "We are never going to forget it".
So tell me....tell me that you still remember. Because I....I have never forgotten.
*******************************************************************************
I have said this before and I don't mind saying it again. No matter where I live, no matter what the season it is there at that time, to me the months of April and May will forever mean summer holidays.
And mangoes. Lots of mangoes.

And amrakhand. We preferred amrakhand over shrikhand and when the mango season was at its peak, there would be amrakhand at the table almost every other day.

Amrakhand is simply mango pulp mixed together with chakka or hung curd and sweetened with a bit sugar. Making it is very easy but it does need some pre-preparation.
Making chakka or hung curd:
Chakka or hung curd is nothing but yogurt from which excess water has been drained off.

To make hung curd, you will need a muslin cloth and a bowl. Place the muslin cloth over the bowl and pour the yogurt in the centre of the muslin cloth. Tie up the muslin cloth tightly with a string and suspend it over a hook. ( I suspend mine over a door knob) and place the bowl directly under the cloth. This is important, else you will end up with a puddle of whey!
After about 4 hours, open the muslin cloth and gently mix the yogurt, tie it up tightly once again and suspend it for another 4 hours. At the end of about 8 hours, you should end up with a creamy yogurt, almost like cream cheese.
(Don't discard the water strained from the yogurt. You can use it in your curries or to knead dough; I use it to make dugh).
Once you have the thick and creamy hung curd, making amrakhand is a breeze.
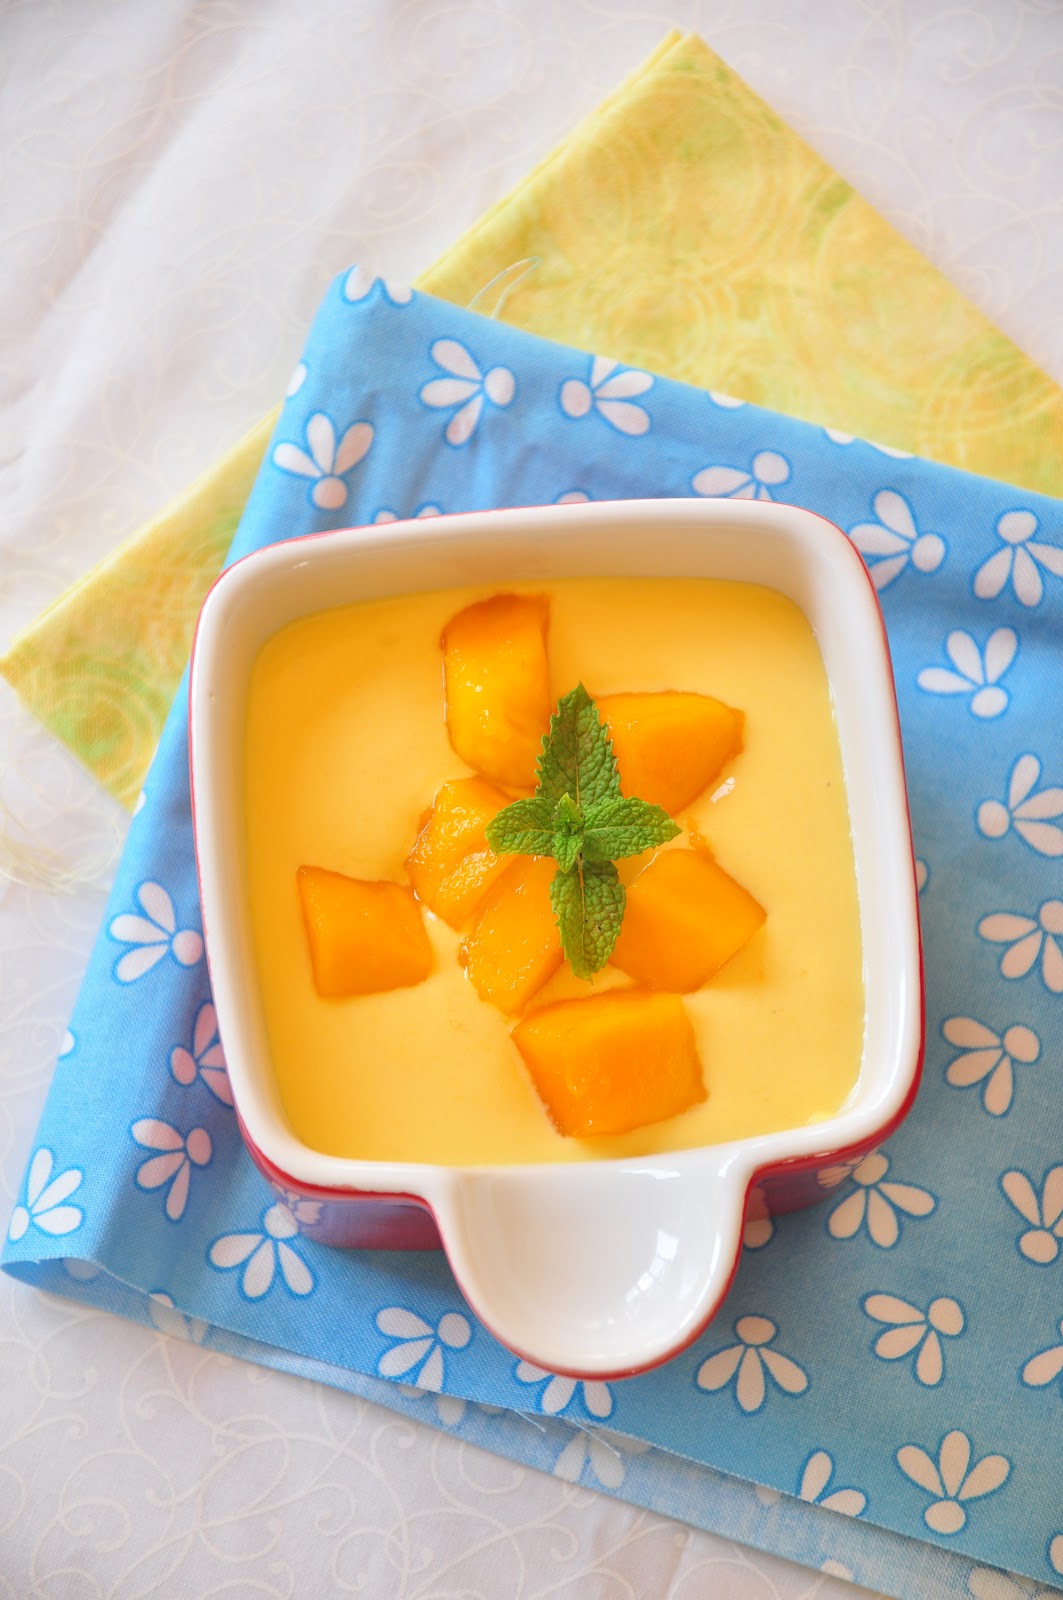
Amrakhand
Ingredients:
Hung curd: 2 cups
Fresh mango pulp: 1.5 cups - 2 cups ( see 'notes' below)
Cardamom powder: 3/4 tsp
Icing sugar: 2 tbsps, or to taste
Salt: a pinch
for garnishing, optional:
Chopped nuts: 2-3 tbsps
Mango cubes: 1/2 cup
Method:
Make mango pulp by pureeing mango cubes in a blender.
Place a sieve over a bowl, put the the hung curd and the mango pulp into the sieve and mix together with a spoon.

You could mix the two directly in a bowl, but passing it through the sieve ensures a smooth, lump - free, glossy amrakhand.
Add the cardamom powder and the salt. Do a taste test and add sugar as needed. I sometimes don't need to add any sugar, the sweetness from the mangoes is good enough for us.
Let it rest in the refrigerator for atleast a couple of hours before serving in order to allow the flavours to mingle.
Garnish with nuts and serve the traditional way, with hot puris.
Or, if frying puris is as tedious for you as it is for me, fold in a few mango cubes and serve it as a post meal dessert. Absolute manna from heaven!

Notes:
Canned mango pulp is very easy to get these days. It doesn't matter. Make amrakhand with fresh mangoes only. For nothing else can match the taste of fresh mangoes in amrakhand.
The colour of your amrakhand will depend on the type of mango used.
Use pulpy as opposed to juicy mangoes. In India, Alphonso mangoes work best. Here in Johannesburg, I used Heidi mangoes.
If I am serving the amrakhand with puris, I use 1.5 cups of mango pulp for 2 cups of hung curd in order to get a thicker amrakhand. I increase the mango pulp to 2 cups if I am serving it as a post meal dessert to get a more intense mango flavour.
Tuesday, March 22, 2011
Banana Bread
It is a well known fact that certain scents trigger specific memories and the smell of coconut oil always takes me back to those Sunday mornings, to the easy rhythm of those days and to my mother's touch and love.
It was only when I got married that I discovered, very much to my chagrin, that coconut oil was a much loved cooking medium in my Tamilian husband's family - and all over South India. Seeing my MIL drizzle coconut oil over a bowl of avial, the only thought I had in my mind was "ewww...wonder whether this bottle has come from the bathroom!" I could barely push 'the food containing hair oil' down my throat that day.

But over a period of time, I fell in love with the taste of coconut oil. It has that 'je ne sais quoi' quality - something that I can't put my finger on, but I do know that there are certain dishes that don't taste quite the same if made without coconut oil.
Much maligned the world over for decades as being heart unfriendly, coconut oil seems to be winning new supporters in recent times as being heart healthy! Just a few days ago, I came across this article extolling the virtues of coconut oil. But in the entire article, this sentence caught my eye - "She also mixes virgin coconut oil in oatmeal for creaminess and flavor, uses it to sauté greens, and has successfully played around with it in brownies and banana bread."
Now, the only way I've used coconut oil is in making some curries and stir - fried veggies . But coconut oil in baking? In brownies and banana bread? My curiosity was piqued.
Somehow, coconut oil in banana bread made some sense to me - both bananas and coconuts being tropical fruits and all that and I decided to experiment with coconut oil the next time I made banana bread.

Coconutty Banana Bread
Ingredients:
Mashed bananas: 1 cup (ideally, the bananas should be over-ripe)
Sugar: 3/4 cup
Egg: 1
Baking soda: 1- 1/4tsp
Grated coconut - 1/4 cup, optional
Coconut oil: 1/4 cup (you could also use any vegetable oil of your choice)
All purpose flour: 1 cup
Whole wheat pastry flour: 1/2 cup (if you don't have whole wheat flour, just use 1- 1/2 cups of all purpose flour)
Baking powder: 1- 1/2 tsp
Cinnamon powder: 1/2 tsp, optional
Salt: 1/4 tsp
Walnuts: 1/4 cup, chopped
Method:
Whisk the flours with the baking powder, cinnamon powder and salt.
Beat the egg and sugar together till fluffy and pale lemony in colour. Then fold in the mashed bananas and the grated coconut. Sprinkle the baking soda over this mixture and fold it in.
Then add the coconut oil in a thin trickle and mix it well into the batter. Finally, fold in the flour in 3 additions and after which mix in the chopped walnuts.
Pre-heat the oven to 180 deg C or 350 deg F. Pour the batter into a greased medium sized loaf pan (I used an oval cake pan as my loaf pan is too large) and bake for about 45 mins or until a skewer inserted in the centre comes out clean.

Once the bread was in the oven and baking, I was overcome with a lot of anxiety. What if the coconut oil ruined the bread?
However, any skepticism I had about using coconut oil in the banana bread was gone with the first whiff of the banana bread as it came out of the oven. It was one very aromatic loaf. Nutty notes from the coconut oil, sweet scent of the ripe bananas and a slight hint of cinnamon. Very aromatic indeed. And the taste - oh the taste! The coconut oil imparts a very delicate flavour to the banana bread - one that lingers on on the palate and almost haunts the taste-buds making you reach out for another slice and another and another. So go ahead and try coconut oil in your bakes, you won't be disappointed!
Tuesday, November 23, 2010
Apple Pie
It is also the one word that I will always associate with my daughter's paediatrician. A phenomenal doctor, she has often gone beyond the call of duty in attending to my daughter. And to think, I met her when I had gone to buy some toys for the little one! A serendipitous meeting but one that I will forever look back on with fondness and gratitude.
She is a constant source of inspiration with her boundless energy and insatiable appetite to learn new things. Cooking is just one of her many passions and this apple pie recipe is adapted from the one she shared with me.

It is quite different from the normal apple pie recipes where the apples slices are simply tossed in sugar and spices and then baked. In this particular recipe the apples slices are coated in a sauce and then baked in the crust.
Yes, it takes longer than the traditional recipes but the resulting pie is totally worth the effort!

Ingredients
for the crust:
All purpose flour: 2 cups
Unsalted butter: 2/3 cups + 2 tbsps/ 175 gms (original uses shortening)
Ice cold water: 4-6 tbsps
Salt: 1/4 tsp
Sugar: 2 tbsps
Method:
Cut the cold butter into cubes and chill again for about 15-20 mins. In a bowl, mix together the flour, sugar and the salt. Add in the butter and rub it into the flour with your fingertips till you get a grainy and crumbly mixture, with pea sized pices of butter.
Add in the water, a tablespoon at a time, till the mixture comes together and forms a dough.
I planned to make 2 five inch pies, and so I divided the dough into 4 equal balls, wrapped them individually in plastic wrap and refrigerated them for a couple of hours.
(The dough is otherwise sufficient for a single 9" pie)
for the filling:
Apples: 6 ( I used Granny Smith)
Brown Sugar: 1/2 cup
Rind of 1 orange and 1 lemon
Cinnamon powder: 1 tsp
Allspice/Nutmeg powder: 1/2 tsp
Orange juice: 1/2 cup
Juice of 1 lemon
Cornstarch: 1 tbsp
Butter: 1 tsp
Pecan nuts/walnuts: 1/3 cup
Method:
Peel and core the apples and cut them into thick slices.
Toss the slices in the sugar, the orange and lemon rinds, cinnamon and nutmeg powders and the lime juice and let them macerate for half an hour.
Then cook the apple slices till they just become limp. Once cooled, add the orange juice and the rum, if using, and refrigerate for at least 4 hours.
After the refrigeration time has elapsed, transfer the mixture into a strainer placed over a larger vessel in order to separate the juice from the apple slices. Allow to strain for about 15-20 mins.
Place the strained juice in a small saucepan and let simmer till syrup. Add the butter, stir and then add in the cornstarch stirring continuously till the juice thickens. Mix the apple slices and the chopped nuts into the sauce and allow to cool.
Assembling the pie:
Take one ball of the dough and on a lightly floured surface, roll it to a 7 inch circle, about 1/8" thick. Gently transfer it to a greased pie pan. Press firmly on the bottom and the sides of the pan, trimming off the excess with a pastry knife. Cover with a cling wrap and refrigerate.
To make a lattice patterned top, first cut out a parchment paper circle the size of your pie pan.
Roll out the dough and cut it into strips as such:

Transfer two strips vertically and horizontally on the parchment circle as such:

Place the next strip vertically and going over the horizontal strip as such:

Then put the next strip horizontally, tucking it under the first vertical strip and over the next vertical strip as such:

Continue placing the strips in a similar manner, going alternately under and over the other strips. The distance between the strips is entirely a matter of personal choice. I love to eat pie crust and hence I chose to have a tightly knit top:

Cover with another parchment circle and chill. Repeat for the second pie pan.
Pre heat the oven to 200 deg C.
Then put the filling into the pie pans. To seal the pie, simply invert the lattice patterned top over the filling and peel off the parchment paper. Seal the strips over the rim of the pie pan, brush the top with some melted butter and sprinkle some caster sugar.

Bake for about 30 - 35 mins or until the top is lightly browned and the juices start bubbling over.
Remove the pie from the oven and allow it to cool for a couple of hours before cutting it.

Serve with some vanilla ice cream or whipped cream; personally, I love to have just as it is without anything else coming in the way of the heavenly cinnamon and orange flavoured apple slices encrusted in a shortbread like flaky crust!
Rushing this pie off to Meeta's Monthly Mingle that Deeba is hosting this month.
Monday, August 23, 2010
Mango Salsa
There are a few people, however, who travel for years together, moving from one place to another. With no fixed address and with no fixed travel route, they seem to live the life of a nomad. Meet one such nomad - Rita Golden Gelman.
A woman who has travelled the world over the past 15 odd years moving from one country to another with no possessions other than those that she can carry in her backpack. A woman for who the end of a 23 year old marriage marked the beginning of an entirely new way of life.
Yes, this is about the book the book club read this month - Tales of a Female Nomad by Rita Golden Gelman, a collection of essays detailing her travel experiences from around the world.
From staying in a Zapotec village, to studying orangutans deep in the jungles in Borneo, to finding spiritual enlightenment in Bali, to trekking in Irian Jaya, to seeking her roots in Israel, to simply living in New Zealand, her travel experiences are phenomenal and often, not something that many of us would be able to or willing to imitate.
She goes from feeling vulnerable at having to travel and eat alone to being supremely confident in the seeking company of fellow travellers on the road. She never lets an opportunity to savour newer experiences slip by her; often times, she employs absolute ingenuity in creating opportunities for herself.
However, the sense of wonder and awe that one normally has when visiting new places (and especially those that are often not accessible to many travellers) is not there in the book. That is because this is not really a travelogue. So, don't read it if what you are looking for is a travelogue in the classic sense. She doesn't really describe or wax eloquent about the places she has been to.
Travels of a Female Nomad is more about how Gelman made her way into people's homes and then their hearts, her interactions with people and her response to the diverse cultures she encountered.
But more than anything else, it is a testament to the fact that it is never to late to live the life that you truly want to lead. As you flip the pages, you start to share her conviction that most of the times, if you only open your heart and mind to people, place your trust in them and simply go with the flow, life's experiences can be very enjoyable.
For that and that alone, this is a book that is a must read.

For some reason, from the time I started reading about her trip to Mexico, I was hoping there'd be some mango salsa somewhere in the book. There was none, but toward the end of the book, there was this salad that she made in Thailand.
So this is what I made: A mango salsa with a hint of Thai flavours.
Just cut some mangoes into cubes and slice some shallots and red chillies as well. Toss them in a dressing made with a few tbsps of pineapple juice, lime juice, sugar and salt. Garnish with some fresh coriander leaves and thinly shredded basil leaves and kaffir limes. Chill for about 30 mins, taste to check the balance of flavours and chill again for 30 mins before serving.
Serve this alongside some grilled chicken; I loved having it with some curd rice.
Edited to add: I recently re-made this salsa with 1.5 cups mango cubes + zest of 1 lemon + juice of 1/2 a lime + a tsp of sugar +2 small shallots, sliced + 1/2 tsp of freshly cracked pepper + salt to taste + 1.5 tbsps of chopped coriander leaves.
This is my entry to Yameen's Health Nut Challenge 7 : Tropical Fruits.
Saturday, July 17, 2010
Blueberry Pancakes
The markets these days are over-run with berries, especially strawberries and blueberries. Singapore doesn't grow too many fruits and vegetables, leave alone berries; being a land scarce country, most of the food that is consumed here has to be imported.
Consequently, though the markets here have a wide variety food from all over the world throughout the year, some of it does cost quite a bit.

Take, for example, my favourite berries - blueberries. Most of the times, a small packet of blueberries weighing just 125 gms costs around $4.
So, sometimes, when they are available for around $2, it sounds like a real steal. That is when I go and buy several packets and hoard them - by freezing them.
To freeze blueberries (and any other berry), first wash them in water. Gently pat them dry with a kitchen towel. I also let the berries 'air dry' for about an hour. Then, transfer them onto a plate in a single layer - ensure that you don't overcrowd the berries - and then freeze them for 24 hrs in the freezer. (Freezing them in a single layer ensures 2 things - one, the berries get evenly frozen and two, they don't stick to one another).
Then transfer them into re-sealable bags; get as much air out of the bags as possible.
Berries frozen this way can be used for upto 3 months - I am not quite sure if they last longer, I am sure they do but mine got used up and so 3 months is the longest that I can vouch for.
This - the tips on how to freeze berries - is my entry to Jaya's Back to Basics event.

Pancakes don't feature very regularly on our breakfast menu, but are such a welcome change every once in a while. Having frozen blueberries on hand means that I can quickly whip up some blueberry pancakes.
The recipe here is the one I found on the Dairy Farmer's Buttermilk carton; I've tweaked it just a tad bit.
Ingredients:
(makes 8 pancakes)
Self raising flour - 3/4 cup
Whole wheat pastry flour - 3/4 cup
Salt - a pinch
Baking soda - 1/4 tsp
Caster sugar - 2 tbsps
Buttermilk - 1.5 cups
Egg - 1, lightly beaten
Lemon rind - 1 tsp
Oil - 1 tbsp + some more for greasing the pan
(Frozen) Blueberries - 1 cup
Method:
Sift together the flours, baking soda and salt in a bowl. Stir in the caster sugar. Then pour in the liquid ingredients - egg, buttermilk and oil - and beat well to get a smooth batter.
Add the blueberries and the lemon rind and stir to combine. Let the batter stand for 10 minutes.
Pour a couple of ladles of the pancake batter on a greased and heated non stick frying pan. Cook for 1-2 minutes or until the top surface is dotted with bubbles. Flip over and cook for another 2 minutes or until golden brown.

Drizzle some maple syrup or honey over the pancakes and enjoy!


