Thursday, August 23, 2012
French Yogurt Cake - where baking is child's play
This is one such story. One that left me awe-struck and proud that my daughter, who refuses to fix herself a bowl of cereal, could independently bake a cake.
My daughter, like me, loves the process of baking. Her eyes fill with wonder as she sees the ingredients added in, one after another, to make a batter that then rises to make a cake or bread, the aroma enveloping the entire house. "Wow, look at that', she exclaims when she sees the final product pulled out of the oven. I bake a lot with her just so I can rejoice with her in her sense of wonder. She has been my most trusted little helper in the kitchen, mixing in the ingredients as I measure them out.
One day, during her 2 month long vacation, she decided she wanted to bake a cake all by herself. She wanted to follow a recipe, she said, and bake a cake. Without any help from me. I was skeptical, she was determined.
We tried a couple of recipes, ones that didn't involve any creaming of butter and sugar, but she would get hassled at the use of multiple measuring cups... 1 1/3 cup of sugar, 2/3 cups of water, 2/3 cups + 2tbsps of oil...you get the picture. Clearly, we needed a recipe that made measuring the ingredients...well, child's play.
Looking up child friendly baking recipes on Google led me to the French Yogurt Cake. Apparently, the French Yogurt Cake is one that French kids learn to bake at a very young age because it is so easy to make.
Type French Yogurt Cake into your search engine and you will be flooded with recipes. I wanted one with a yogurt pot measure and ended up using this recipe as a guideline.

FRENCH YOGURT CAKE
Ingredients:
A bored toddler
A mom willing to clean up after the toddler is done
Full fat yogurt*: 1 pot (mine was 100gms)
Sugar: 2 pots, around 205 gms
All purpose flour: 3 pots, 220 gms
Eggs: 2 nos, or 100 gms
Oil: 3/4 pot
Baking powder: 1 1/2 tsp
Vanilla essence: 1 tsp
Salt: 1/4 tsp
Zest of a lime, optional
*You can use a yogurt pot of any volume...100 gms, 125 gms, 150 gms. Given the 1:2:3 ratio of yogurt, sugar, and flour, the quantity of sugar and flour will proportionately increase. Ensure that the weight of the eggs is equal to that of the yogurt. Also, you will need to increase the baking powder; for this cake, you will need to use 3/4 tsp per 50 gm egg.
Method:
Sieve together the flour, salt and baking powder 3 times.
Lightly beat the eggs with a fork. Add the sugar to the eggs and mix it in. To this, add the yogurt and the vanilla essence.
Next, pour the oil in a thin stream.
Finally, fold in the flour in 3 quick additions. Add the lime zest, if using.
Grease and line a 8" cake pan or a loaf pan and bake at 180 deg C or 350 deg F for about 30-35 mins, or until a skewer inserted in the centre of the cake comes out clean.
(I draw the line at measuring the ingredients, making the batter and pouring it into the pan. When it is time to handle the oven, I make sure that I am around).

This is delightfully soft cake and is perfect with a cup of tea or coffee. I savour every bite, not because it is a nice cake, but because of the little hands that make it! Try making this with your toddler and revel in their sense of accomplishment. Worth every single crumb, I promise.

Monday, August 13, 2012
Tres Leches Cake
I am, by nature, a procrastinator. My parents had nicknamed me 'the Queen of all things last minute'. It is not hard to see why. When in school, the homework would be done early in the morning between large gulps of milk, in college, projects would be finished by burning the proverbial midnight oil. Even today, I tend to fill out forms minutes before they need to be actually submitted. If you need any further proof of just how I tend to procrastinate, check out my entries to various food blog events...most of them are after the submission date.
When it comes to making desserts, however, I am the exact opposite. I will usually start making desserts soon after I have read the recipes - before I have even ascertained that I have all the ingredients that a recipe calls for.
So, why it took me almost 5 years to make the Tres Leches Cake is beyond me.
I first heard of, or rather read about, the Tres Leches Cake when I was looking up recipes for the Dulce de Leche flan. 'Pastel de Tres Leches' appeared as a related recipe on one of the many sites I visited.
I was intrigued by the Tres Leches Cake. The entire concept of mixing together and pouring a combination of 3 types of milk, and hence the name which translated means 3 milks cake, (condensed milk, evaporated milk and fresh cream) over a sponge cake fascinated me. Ever since I read about the cake, I made it many times....in my head. Sometimes, I would top the cake with mangoes. Other times, it would be peaches or lychees.
But I always stopped short of actually making the cake. I think it was fear that the milk mixture, devoid of any flavouring, would make the cake taste and smell very milky.
A couple of weeks ago, I came across a recipe that recommended using buttermilk. I loved the idea of using buttermilk, the tang from the buttermilk would be perfect to counter the 'milkiness' of condensed milk and evaporated milk.
I wasted no more time in making the Tres Leches Cake.

Tres Leches Cake
for the cake (recipe from the Pioneer Woman)
Eggs: 5, separated (mine weighed 51 gms)
Sugar: 1 cup
Milk: 1/3 cup
Vanilla essence: 1 1/2 tsp
All purpose flour: 1 cup
Cornflour: 1 tbsp
Baking powder : 1 1/2 tsp
Salt: 1/4 tsp
Oil: 1 tbsp
Method:
Sift together the flour, cornflour, baking powder and salt.
Whip the egg whites till you get soft peaks. Add 1/4 cup of sugar and whip till you get stiff peaks and set aside.
Beat together the egg yolks and the remaining 3/4 cup sugar till pale and creamy; the mixture should fall in ribbons when the beaters are lifted from the mixture.
Add the milk and vanilla essence.
Next, fold in the flour with a spatula till just combined.
Fold in the egg whites in 3 batches, and then add the oil and mix.
Pre-heat the oven to 350 deg F or 180 deg C. Grease and line a 10" round cake pan (I used a 9" cake pan, but on hindsight, I feel a 10" cake pan will be better; the original recipe uses a 9" x 13" pan).
Bake for 30-35 mins, or until a skewer inserted comes out clean. Cool the cake and then poke it all over right down to the bottom of the cake (at 1/2" intervals) with the skewer.
for the soaking liquid (adapted from Un Dejeuner de Soleil):
Evaporated milk: 1 1/2 cup
Condensed milk: 1 1/4 cup
Buttermilk: 3/4 cup
Brandy: 1 1/2 tbsps, optional
Vanilla pod: 1 small, or vanilla essence: 1 tsp
Method:
Slit the vanilla pod length-wise and scrape the seeds. Add the pod and the seeds to the evaporated milk and heat it till bubbles start to form around the edges of the evaporated milk. Cool and then add the condensed milk, buttermilk and brandy, if using.
Return the cake to the cake pan - I used a 9 1/2" springform pan, which made it easy for me to later transfer the cake on the cake platter - and slowly pour the milk over the cake starting at the edges and moving to the centre. I poured the milk in 3 batches, at an interval of 5 minutes between each addition.
Cover with clingfilm and refrigerate for at least 3-4 hours in order to allow the cake to absorb all the liquid.
for the topping:
Whipping cream: 300 ml
Icing sugar: to taste
Vanilla essence: 1/2 tsp
Frozen mixed berries: 450 gms
Sugar: 1/2 cup
Lemon juice: 1 tbsp
Cornflour: 2 tbsp mixed in a little water
Whip the cream with the icing sugar and essence till you get soft peaks.
Mix together the berries with the sugar and lemon juice and set aside for 30 minutes. Then, cook over a low heat till the berries soften and the juices start bubbling. Add the cornflour and stir continuously till the sauce thickens. Cool to room temperature.
Transfer the cake on a serving dish and spread the whipped cream over the top and sides of the cake and spoon the berry coulis over the top.

I made the Tres Leches Cake for a dinner party and it was devoured. Yes, devoured. There is no other word for it. This is all I was left with the next day; I barely manage to get a decent slice for a picture.
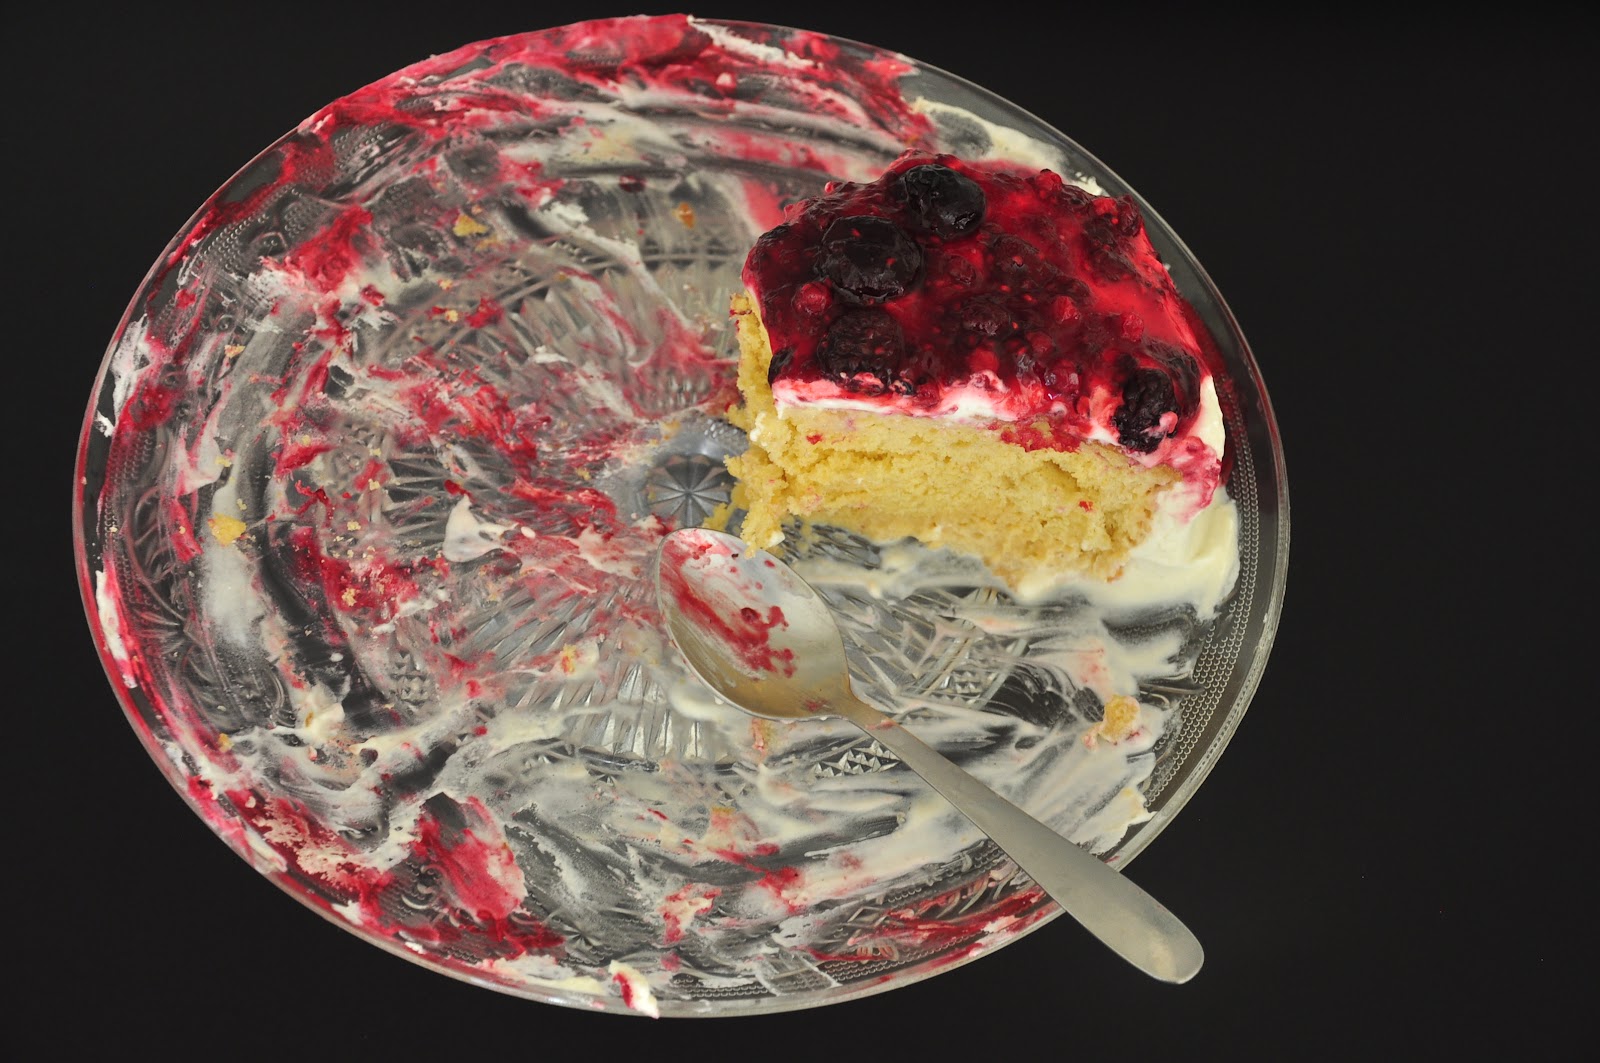
So, how is the cake, you ask.
To tell you the truth, in spite of all the praises heaped on the Tres Leches Cake, I made it with a bit of skepticism. I kept wondering if the soaking liquid would drown the cake and make it soggy, but I was wrong. It is amazing how the soaking liquid does not drench the cake. The cake stays firm, each slice retains its shape and yet each bite is very moist. The buttermilk gives it a slight tang, almost indiscernible, but still very much there. And then there is the whipped cream with the berry coulis...an explosion of flavours and texture in every bite.
I loved it so much that I can't wait to bake it again.
Oh, and in case if you are wondering what to do with the leftover evaporated milk, cream and condensed milk, make this kulfi which needs exactly the same ingredients.
Clearly, on some days, you can end up with a lot of dessert!
Sunday, November 27, 2011
Lemon Poppy Seed Whipped Cream Cake
You see, there was this time a few years ago when I decided to go on a diet - nothing too drastic, all I was trying to do was stay away from desserts.
"Come off your diet nonsense and have a small slice," my friend ordered at a coffee morning she was hosting. The cake looked very moist and had a tender crumb and my no dessert resolve was getting a little weak. "Oh and by the way, it doesn't have any oil or butter," she added. That clinched it. I happily dug into the cake.
"How did you manage such a moist cake without using any oil or butter?" I asked her, my curiosity thoroughly piqued.
"Oh, sweetie, but this cake uses fresh cream. 40% fat," she said very nonchalantly.
I could have strangled her, but settled for the recipe instead. Months passed and I eventually forgot about the cake till recently when I started seeing this cake all over my FB wall.

High time I made it myself, I thought. So, I pulled out the recipe and set to work.
But how does the 'lemon poppy seed' part come into the picture, you might wonder. It might sound a little silly but after having lived the past almost 9 years in countries that have banned poppy seeds, I had made up my mind that whenever I moved to a country where poppy seeds where sold in grocery stores, the first cake I would bake would have poppy seeds in it. (In fact, a packet of poppy seeds was one of the first things I purchased when we moved to Johannesburg).
So that is how the Lemon Poppy Seed Whipped Cream Cake happened.

Lemon Poppy Seed Whipped Cream Cake
Ingredients:
Heavy Cream : 1 ½ cups
(Rose recommends 40% fat for a more tender crumb, this cream is not readily available off supermarket shelves and needs to be procured from speciality stores/restaurants or bakeries; mine had 34%)
Eggs: 3 (150 gms)
Superfine sugar: 1 cup + 2 tbsps
Vanilla essence: 1 tsp
Cake flour: 2 ¼ cups (or 2 cups All purpose flour)
Baking powder: 2 tsps
Salt: ¾ tsp
Poppy seeds: 2 tbsps
Lemon zest: 1 tbsp
Oil: 1 1/2 tbsp, optional (I used oil to compensate for the lower fat % in the cream )
Lemon juice: 2 tsps
Method:
Pre-heat the oven at 375 deg F or 190 deg C ( 350 deg F or 150 deg C if using a dark pan) for 20 minutes.
Grease and dust a 10 cup metal fluted pan (I don't have one and used a bundt pan instead).
Whisk together the eggs and the vanilla essence until combined. Set aside.
Sift together the flour, baking powder and salt. Mix the poppy seeds and the lemon zest into the sifted flour, set aside.
Whip the cream till it thickens and forms stiff peaks.
With the beaters still running, pour the eggs mixture into the cream. The mixture will emulsify into a mayonnaise like consistency.
Next, beat the sugar into the mixture.
Fold the flour in 2 batches. Mix well until no streaks of flour are visible.
Finally, mix the oil and the lemon juice.
Bake for about 25-30 or until a skewer inserted comes out clean. (It took me about 40 minutes to bake the cake, but that could well be my oven).

For the lemon glaze:
Icing sugar: 1 ¼ cup
Lemon juice: 2 tbsps
Water: ½ tbsp
Mix together the icing sugar, lemon juice and water till smooth. Pour it over the cooled cake and let it rest until it sets, about 10 minutes.

Soft and moist, a slight crunch from the poppy seeds and a delicate lemony fragrance and taste, this is the perfect slice to have with your evening cup of tea. Enjoy!
Wednesday, November 16, 2011
Kouign - Amann


The inimitable David Lebovitz has a recipe for Kouign Amann; why buy what you can make at home? So I rolled up my sleeves and got my fingers deep into the dough.

Ingredients:
Cut the butter into cubes and let it chill.
Lightly dust the countertop with some flour and roll the dough into a rectangle 12”x18” (the 12” side should be on your left and right, the top and bottom of the rectangle should be about 18” - mine was not as big, though I didn't measure the exact dimensions).


(drowned in sugar, my entry to Susan's Black and White Wednesday)
Roll the dough into a rectangle once again (of similar dimensions as before). I found the dough more difficult to work with at this stage and so I rolled it for a bit and then finally stretched it with my hands.
Pre-heat the oven to 425 deg F or 220 deg C (I thought 200 deg C worked better, I thought my cakes were a bit dry when I baked them at 220 deg C) and butter a 9” pie plate.
Open the cling wrap and shape the chilled dough into a disc to fit your pie plate. Lift the cling wrap and invert it over the pie plate. Sprinkle the last ¼ cup of cinnamon sugar over the top and drizzle with 1 tbsp melted butter.
Bake for about 40-45 minutes or until the top is caramelised. Let it rest for a couple of minutes, slide onto a wire rack and cool for about 10-15 minute.
Taste it. Melted butter oozing out and mingling with caramelised sugar…..oh, utter bliss. The Kouign-Amann has been Yeastspotted, hosted by Hefe and Mehr.
It is customary to post something sweet, something decadent especially when marking blog anniversaries. This Kouign- amann celebrates my third blog anniversary. It is a very special recipe to me, because had it not been for blogging, I would never have attempted making something that isn’t pronounced the way it is written! Blogging has made me stretch my own limits in the kitchen and how!
Saturday, April 30, 2011
Chocolate Layer Cake

Much as it has been a busy time this past month - and it will continue to be so over the next couple of months - I have been baking a lot, in fact, more than I normally do over the last month.
Baking gives me a lot of comfort, it is my way of unwinding. Baking de-stresses me like nothing else can. At the end of a long tiring day, all I want to do is not rest, but head to the kitchen at night and bake. I love to bake late at night, when I can be in the kitchen absolutely undisturbed - no telephone calls to be answered, no doors to be opened, no husband or child to attend to.
Gathering the ingredients, mixing them into a batter, waiting for the oven to do its magic, basking in the aromas enveloping the house and pulling out a perfectly baked cake from the oven - sometimes, I bake more for the love of the process than to actually eat cake!


Edited to add...My apologies to anyone who lands on this page and doesn't find a recipe. Please email me for the recipe.
aquadaze@rediffmail.com
Thursday, February 24, 2011
Carrot Cake
It was night, not at all late by our standards - barely quarter past nine - but in the small town that we were spending a few days holidaying, it might as well have been midnight. Shops and restaurants were shut; even this cafe had its shutters halfway down. We were craving something sweet and while the dessert list boasted things such as Death By Chocolate, New York Cheesecake and Tiramisu, all that was left in the cafe when we walked in was a slice of carrot cake.

"Try mine, you will change your mind about carrot cake", he said confidently.
It was love at first bite and early next morning, we were back at the cafe, ready for more carrot cake. In fact, for the rest of our stay, we religiously dropped in at the cafe each morning for some carrot cake.

Before we left, I casually requested him for his carrot cake recipe, expecting a 'no' for an answer. I was aghast when he produced a print-out of the recipe.
Check it out forthis recipe is, without any exaggeration, the best carrot cake ever. Seriously. The best carrot cake ever!
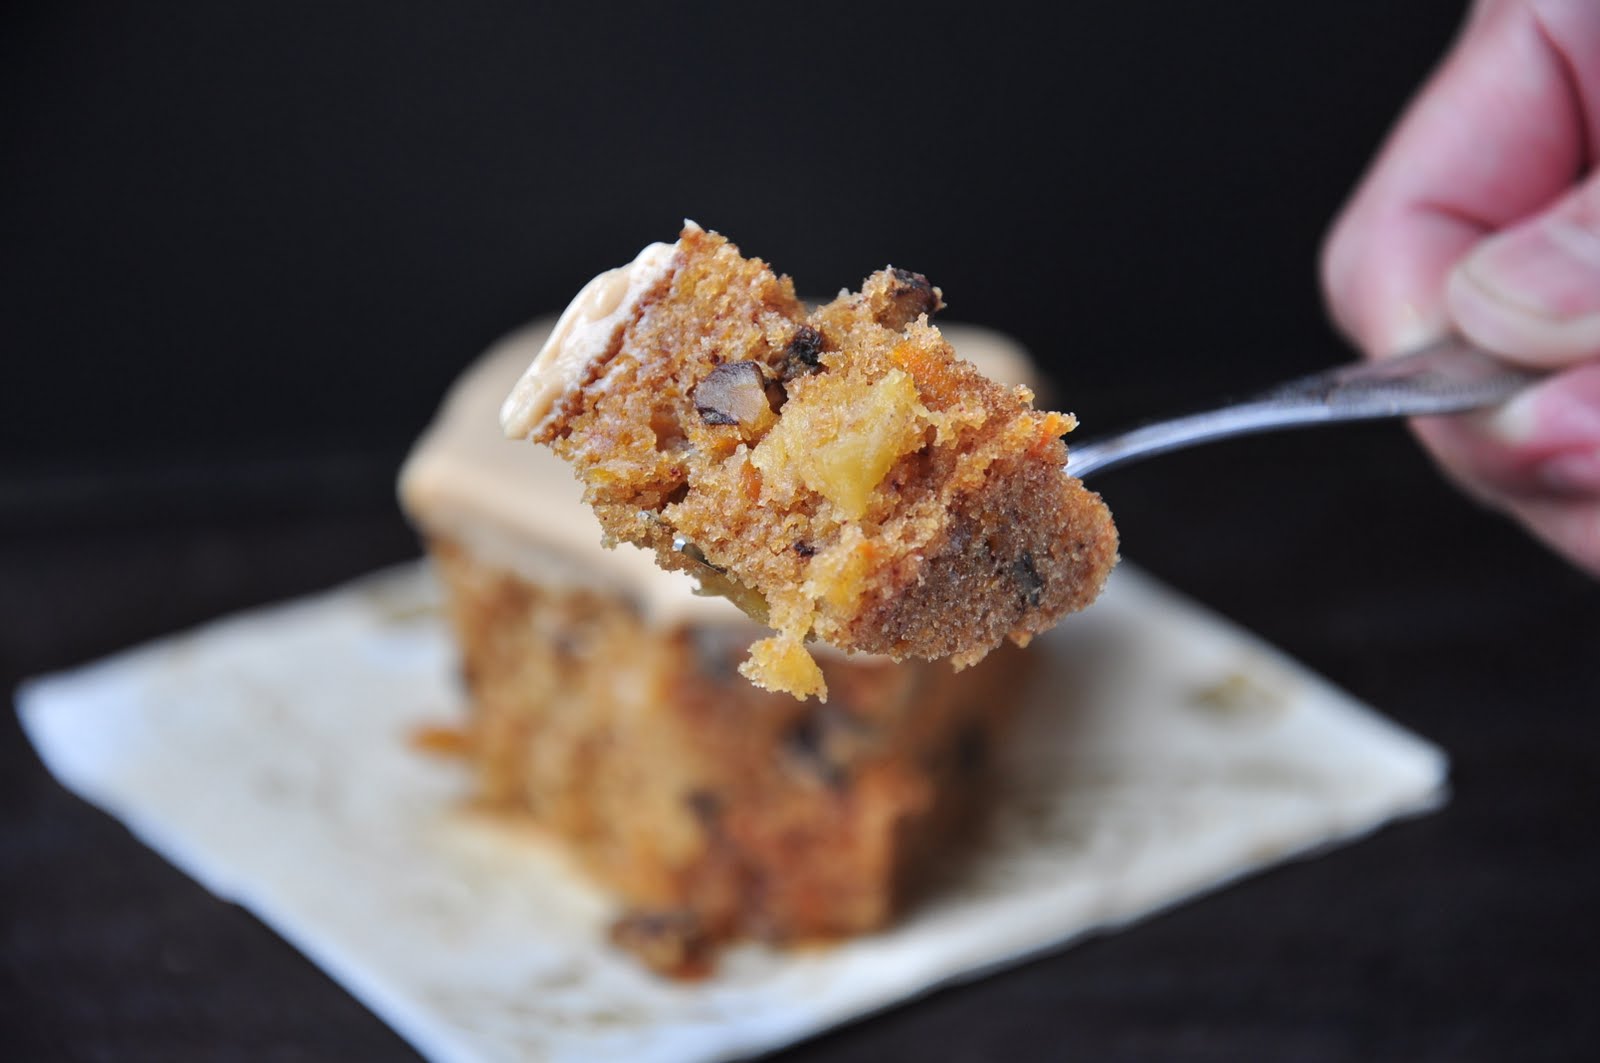

Edited to add... My apologies to anyone who lands on this page and doesn't find a recipe. Please email me for the recipe.
aquadaze@rediffmail.com
Tuesday, December 28, 2010
Rich Chocolate Mud Cake
Now with the kids fast asleep and the husband not expected back home for at least another hour, she could finally start baking.
But just as took the whisky bottle out of the liquor cabinet, she heard the key turn in the lock. The husband was back earlier than expected. On any other day she would have been thrilled but today she felt a small pang of disappointment. "There goes my baking," she thought to herself.
"Having a drink all alone, are you? he smiled as he walked in. "Pour me one as well, I'll take a quick shower and join you."
"I wasn't drinking. You know I never have a drink alone! I was just about to bake a cake but you've put paid to all my plans now by coming back earlier," she smiled.
"Cake with whisky in it....now that sounds intriguing. Never heard of one before."
"I'm sure it is going to be yum. I can just feel it."
"Tell you what - let's have a quick drink and have dinner and then we can bake that cake together!" He had never quite understood her passion for baking - he wondered why she bothered putting in so much effort when there were very good gourmet cakes available all over the city. But over the years, he had learnt better than to dissuade he from baking and deprive her of the pleasure she derived from baking.
"Sounds like a great plan," she beamed.
An hour later, he was ready to bake.
"Now?, she said, looking at the clock. It was a quarter past ten. "Too late for that now. The cake takes an hour and a half to bake. I am just too sleepy - the whisky has made me way too drowsy, no way I can sit up and wait for it to bake! I'll bake in the morning. Clear the kitchen, will you please? I can barely keep my eyes open."
"Sure thing."
He started putting away the measuring cups and the cake pan and happened to glance at the recipe that she had printed out. Whisky in a cake? With chocolate and coffee? Somehow, it just didn't sound right to him. Rum and chocolate and coffee was a great combination, but whisky? It just didn't appeal to him!
As he put the whisky back into the liquor cabinet, his eyes fell on the bottle of Kahlua. That was it....Kahlua, and not whisky, was perfect for the cake.
Suddenly, he was in the grip of an overpowering urge to bake the cake right away, all by himself. Soon, he was in the kitchen, melting and mixing the ingredients, getting intoxicated by the combined aromas of coffee, chocolate and Kahlua.
Two and a half hours later, he had not just baked the cake but had also set in on a platter on the table and secured with a ribbon - as a surprise for her - his face radiating the pleasure of someone who had just discovered the urge, the joy and the satisfaction of baking from scratch.
This food fiction is off to Jaya of Spice and Curry who is hosting Of Chalks and Chopsticks - 6.

Rich Chocolate Mud Cake (adapted from from Australian Women's Weekly).
Ingredients:
(A)
Butter: 250 gms
Sugar: 1 and 3/4 cup
Dark Chocolate: 200 gms
Kahlua: 1/3 cup or 80 ml
Instant coffee granules: 1 tbsp
Warm water: 250 ml or 1 cup
(B)
Plain Flour: 1.5 cups or 225 gms
Self Raising Flour: 1/4 cup or 35 gms
Cocoa Powder: 1/4 cup or 25 gms
Eggs: 2
Method:
In a saucepan, mix together all the ingredients listed under (A). Stir on a low heat until the chocolate melts. Cool it to room temperature.
Whisk together all the dry ingredients listed under (B). Add the cooled chocolate mixture to the dry ingredients and mix until you get a smooth batter.
Lightly beat the eggs and add it to the batter.
Grease and line a (deep) 20 cm or 8" cake pan and transfer the batter into the pan. Bake at 160 deg C for 90 mins or until a skewer inserted comes out clean.

Notes:
1. I pre-heat the oven for this recipe for just about 15 minutes.
2. I halved the recipe and baked it in a 6" square tray; it took me just under an hour to bake my cake.
3. I thought that the water was a bit too much, so I plan to reduce it to 225 ml the next time.
This is a dense and intensely chocolatety cake with a whiff of coffee and Kahlua. I served this cake with some raspberry coulis and vanilla ice cream - sinfully delicious!
Sending this cake off to Ria who is hosting Meeta's Monthly Mingle, the theme this time is Chocolate Extravaganza.
Wednesday, December 15, 2010
Chocolate Chip Muffin
I put her in front of the telly telling her she could watch it for as long as she wanted to. I expected her to be glued to the telly but the moment she realised that she had a free rein to watch her favourite cartoons, she quickly lost interest in watching them.
"Play with me", she said to me.
"Why don't you fix some puzzles", I suggested. "And then you when you are done, you can have some chocolate". Yes, I was subtly bribing her to leave me alone for some more time. To her credit, she did manage to keep herself busy with the puzzles for a while and I gave her some chocolate as promised.
"But I don't want to have chocolate", she said. I was flummoxed - I mean I can't ever say 'no' to chocolate and here she was, a 5 year old, refusing to have any. But I hadn't heard the rest of it....
"......I want chocolate chip muffins. You make some muffins now", she demanded.
"Mama's head is aching", I explained to her. "Let me rest just a little while longer, then I'll have some tea and make you the muffins", I told her.
She nodded and went off to her room. I could hear toys being scattered and then the sound of a tap gushing and braced myself for a major clean up operation later in the day. Moments later, she was standing next to me, her toy teacup filled to the brim with water in one hand and a tube of Euky bearub in the other.
"Mama will drink the tea and put the balm and she will become alright and then we can make the muffins", she proclaimed confidently.
Anything for such an adorable caregiver! I headed straight to the kitchen and started to fix her some muffins right away.

Some days remain etched in memory forever. I don't think I can never ever forget the sight of my little girl helping me to make the muffins that day. I measured out the dry ingredients and she whisked them together. Then she poured out the wet ingredients and I mixed everything together to get the batter ready. I spooned it out into the muffin tray and she sprinkled the chocolate chips on top. In no time, the aroma of freshly baked muffins wafted through the house.

These muffins are very very quick and easy to make. I have stayed true to the original recipe from Joy of Baking except for a very minor change - instead of sprinkling the cinnamon on top, I mix it into the batter. A very small change but one that makes a significant improvement to the taste.
Ingredients:
All purpose flour: 3/4 cup
Whole wheat pastry flour: 1/4 cup
Baking Powder: 1.5 tsps
Salt: 1/4 tsp (omit if using salted butter)
Cinnamon Powder: 1/2 tsp
Sugar: 1/3 cup + 1 tbsp
Semi sweet/ bittersweet chocolate chips: 1/2 cup
Egg: 1
Milk: 1/2 cup
Butter OR Oil: 1/4 cup + 1 tbsp
Vanilla essence: 1 tsp
Method:
Pre-heat the oven to 190 deg C/ 375 deg F. Grease a muffin pan with butter or baking spray.
Whisk together all the dry ingredients. Reserve a tbsp of the chocolate chips and toss the the rest into the dry ingredients.
Melt the butter and let it cool completely but don't let it set again. Whisk together the cooled melted butter, milk, egg and the vanilla essence. Fold this mixture into the dry ingredients, stirring until the ingredients are just combined.
Spoon into the prepared muffin pan. Sprinkle the reserved chocolate chips on top and bake for about 20 minutes or until a toothpick inserted in the centre of the muffin comes out clean.

Incredibly moist and with a delicate crumb, these muffins are best eaten on the day they are made and best served a little warm. I prefer them with bittersweet chocolate chips, but they are slightly bigger and don't look as nice as ones with the semi sweet chocolate chips.
You could also make them with oil, they are a little more denser when made with oil but are definitely more healthier and just as tasty.
Enjoy!
Sending this cake off to Ria who is hosting Meeta's Monthly Mingle, the theme this time is Chocolate Extravaganza
Saturday, August 7, 2010
Strawberry Mirror Cake
However, when it comes to this Strawberry Mirror Cake, the superlative is difficult to avoid. But I don't want to hazard claiming that this is the best dessert ever and so I will just stop at saying that this is the best dessert that I can whip up. Not only is it gorgeous and elegant looking, it tastes better than it looks. Go on, drool over that slice.....

A few years ago, we were invited for dinner at a friend's place. Now, I am a dessert-first kind of person but I refused the dessert that day. Because for dessert was (a very delicious looking) strawberry mousse and mousse normally has raw eggs in it and I don't eat raw eggs.
"This doesn't have any eggs. In fact, it is made from - you won't believe it - ice cream and jelly!"
The mousse was fantastic and I just had to have the recipe. However, my recipe request was firmly turned down. "No sharing of recipes is going to happen," she said.
What friends don't share, Google happily does. I wasted no time in surfing the net, tried a few recipes; the one I stumbled upon at the OChef website tasted exactly like the one she had made.
A very easy dessert to make, the mock Strawberry Bavarian as it appears on OChef is very versatile too. I've made it in cherry and raspberry flavours with equally delicious results.

So, where does the Strawberry Mirror Cake fit into all this ramble, you might wonder. I am coming to it....
When I started blogging, I came across this group that calls itself 'the Daring Bakers'. One day, while browsing through one such intrepid blogger Sunita's blog, I came across the stunning Strawberry Mirror Cake and borrowed the basic presentation idea there to make mine.
My Strawberry Mirror Cake is a fusion of 3 different recipes. It might, by the look and sound of it, seem complicated but I can assure you that it is not so. And the end result is more than worth all the effort, both in terms of the way it looks and tastes.
I hope rather long recipe doesn't put you off - in any case, there are only 4 main steps; what you need to do is simply organise the steps.
Here's how I make it:
I start by baking the sponge cake.
Ingredients:
Eggs: 4
Sugar: 120 gms
Cake flour: 100 gms
Vanilla essence: 1 tsp
Butter: 65 gms, melted
Method:
Pre-heat the oven to 175 deg C.
Cream together the eggs and sugar till they are pale, light and creamy and the mixture falls in ribbons, about 10 mins. Sprinkle the flour and fold it into the egg sugar mixture with the help of a spatula. I do this in 3 additions. Beat this egg-sugar-flour mixture till it falls in ribbons again, about 1o - 12 mins. Finally, fold in the melted butter.
Bake in a greased 8" round cake pan for about 30-35 minutes or till a skewer inserted comes out clean.
Leave on the wire rack till it cools completely. Once cool, slice into 2.
While the cake bakes, set about preparing the strawberry juice for the mirror and for moistening the cake.
Ingredients:
Strawberries: 680 gms
Sugar: 1 cup
Water: 1 cup
Lime juice: 1/2 tsp
Method:
Wash and hull the strawberries. Mash them with your hands or with the back of a spoon; sprinkle sugar over them and drizzle the lime juice. Set aside for about 15-20 mins so that the juices start to flow.
Place over low heat, add the water and simmer for about 10 mins. Strain through a fine sieve or preferably a cheesecloth and let drain for about 15-20 mins.
Reserve 1.5 cups for the mirror and use the rest for moistening the cake.
Now that the pre-preparation is through, move on to making the mock strawberry bavarian
Ingredients:
Strawberry-flavored gelatin: 7.5 ounces/225 gms
Boiling water: 2 1/2 cups
Sour cream: 1 1/4 cup
Vanilla ice cream : 600 ml (the original recipe uses strawberry ice cream)
Lemon juice: 1 1/4 tbsp
Strawberries: 250 gms, chopped
A large bowl of ice
Method:
Place the jelly in a bowl and add the boiling water to it. Stir till the crystals dissolve. To this, add the sour cream and whisk until smooth.
Next add in the ice cream and mix until the ice cream has melted. Squeeze in the lemon juice and add the chopped strawberries.
Place the vessel over a bowl of ice and stir till the mixture just starts to thicken. Once that happens, take the bowl off the ice (don't throw away the ice, you are going to need it for the mirror) and start to assemble the gateau:
In a 10" springform pan, place one half of the cake. Drizzle some strawberry juice to moisten the cake. Layer half of the bavarian on top of the cake and refrigerate for 15 mins.
Repeat with the other layer of the cake and refrigerate for about 30 minutes.
This is the last step, making the strawberry mirror.
Ingredients:
Strawberry juice: 1.5 cups (yes, the one we set aside earlier)
Lemon juice: 1 tsp
Kirsh: 1 tbsp (I omit this)
Water: 1 tbsp (I use 2 tbsps)
Unflavoured gelatin: 1 tbsp
A few drops red food colouring (I omit this)
Method:
Place the lemon juice and water in a bowl. Sprinkle gelatin over the mixture and aside till the gelatin becomes soft and spongy.
Meanwhile, bring the juice to a simmer and pour it over the gelatin mixture. Stir to dissolve the gelatin. Add the colouring, if using.
Now place the mixture over a bowl of ice and stir till the mixture is syrupy and starts to thicken. As soon as it starts to thicken, remove the bowl from the ice. Scoop off any bubbles that may have formed while stirring and pour it over the top layer of the bavarian.
Refrigerate until the jelly sets.
To unmold, blow your hairdryer (YES! ) on its lowest setting all around the outside of the springform pan (you could even use a warm towel and run that on the outside of the pan) Then, run a spatula around the edge of the jelly to gently separate it from the sides of the pan - this step is most critical as the mirror could tear if it is stuck to the pan when you unlatch it.
The Strawberry Mirror Cake is a fitting end to a dinner party and so I am taking it along to Nupur's Potluck Party (the theme for this month's BB6).
Friday, June 4, 2010
Story Book Cake
The one thing that I really look forward to doing for my daughter every single day is putting her to sleep at night. No, not just because when she finally sleeps, the house is quiet at last and I get some 'me' time but because reading to her at bedtime is a routine that I simply love and look forward to all day!

A google search led me here and I fell instantly in love with what I saw. Come D-day and I ran out of steam - or maybe had too much of it in the kitchen given the soaring temperatures in our neck of woods - and abandoned all plans of making the chariot and the wand and so the end result is different from the one I saw on Cake Central, but the birthday girl was thrilled with what she saw and that is all that mattered!

To make this cake, I put two 10" square cakes alongside each other and sliced off about 2.5" at an angle to get the book shape. The cake is covered with fondant icing . The flowers used are store-bought, my only contribution to the flower vine are the stalks and the leaves. I used gold dust powder mixed with a few drops of water to get the yellowing pages effect - this is the only bit that I was a tad unhappy about as I failed to get a uniform look - for whatever reason, the 'paint' didn't adhere to the fondant resulting in a patchy look.
If anyone reading this has any suggestions on what I should've done, please do leave me a comment.

This, I know, is a very sketchy post, but do check out these 2 posts - Decorating a birthday cake: step by step tutorial and Cake decoration with fondant icing: a step by step guide - to know more about cake decoration.
If you have any specific questions on making this cake, do drop me a line on aquadaze{@}rediffmail{dot}com
Tuesday, May 11, 2010
Chocolate Orange Bundt Cake
That is was the case when I saw the Cinnamon Chocolate Bundt Cake on Deeba's blog sometime back. I think I headed straight to the kitchen after reading it. And ever since, I've been baking this cake regularly. Very regularly, in fact.
Not only is the cake a breeze to make, it tastes absolutely awesome. Intensely chocolatey with a hint of cinnamon, it is a crowd pleaser.
Which is why I take it very often when we go visiting friends. Which why I decided to make it for a dinner that we were invited to. But then, just as I finished measuring the ingredients, panic struck. Three of the guests had already had this cake. Now I didn't want them to assume that I knew only one type of cake, did I?
It was late at night, around 10 I think, and I really wasn't in a mood to contemplate which other cake to make and then start the process all over again. Maybe, I could change the flavour and then it would be okay. Coffee was the obvious choice. But then, just as I was reaching out for the jar of coffee, my eyes fell on a bottle of orange essence. Lying unopened for over 4 months.
And then, I was inspired.......why don't I make...oh if only I have some oranges.......which, almost miraculously, I did and so this Chocolate Orange Bundt cake happened.

Ingredients:
(Adapted from Passionate about Baking who adapted it from The Food Librarian who got the recipe from Vintage Visuals - quite a link list that!)
Water: 1/2 cup
Butter: 1/2 cup or 115 gms
Oil: 1/2 cup
Cocoa: 5 tbsps
Orange juice: 1/2 cup
All purpose flour: 1 1/2 cups
Wholewheat flour: 1/2 cup
Salt: 1/2 tsp
Sugar: 1 3/4 cup
Buttermilk: 1/2 cup
Baking soda: 1 tsp
Eggs: 2 nos
Orange zest: 1 1/2 tsps
Orange essence: 1 tsp
Method:
Pre-heat the oven to 375deg F or 190 degC
Combine the water, butter, oil and cocoa powder in a saucepan and bring to a boil. Turn off the gas and then add the orange juice.
Next, add the sugar in and mix well to combine. Mix both the flours with the salt and add it to the chocolate-sugar mixture. Stir carefully till there are no lumps.
Then add the buttermilk and baking soda.
Finally, whisk together the eggs, orange essence and the zest and add to the batter. Mix well.
Pour the batter into a bundt pan (grease the pan first!) and bake for 35 mins*.
(*original recipe calls for 25 mins, but mine takes between 35 and 40 mins).
Let the cake cool completely in the pan - about 2 hours - before you turn it onto a serving plate.
For the ganache - and this is optional, but adds oodles of flavour to the cake:
100 gms chocolate
75 gms butter
few drops orange essence (skip if you use an orange flavoured chocolate)
zest of an orange
Melt the chocolate and butter over a double boiler. Add a few drops of orange essence and stir briskly for a minute. Allow to cool and then pour it over the cake. Sprinkle the orange zest on top.

So now you want to know which tastes better - cinnamon or orange. You do want to know, don't you?
This is where I should be diplomatic and say "depends on your taste, really." Which, to a large extent, it does.
Personally, I preferred the orange flavoured one. For three reasons. One, I love the chocolate - orange combo. Secondly, the flavour of oranges does not overpower the chocolate and still manages to linger on the palate. And yeah, thirdly, this is my twist on the original recipe - sometimes, I do toot my own horn!
Nupur's theme for Blog Bites this month is Adaptation, this is my entry to the event.
Tuesday, March 30, 2010
Chocolate Truffle Cake
But wait, there is a good reason for it - you see, I've never been able to click any pictures for this cake. No one has the patience for pictures to be clicked. The moment the frosting is on the cake, it has to be cut and eaten.
Even this time, I had just 3 'neat' slices to click pictures of. And just take a look at what my daughter resorted to while I tried to set the plates for the pictures:

Does this give you an idea of how good this cake is?! Yes, this cake is really that good. Even if I have to say it myself. So good that even you would want to lick your fingers and the plate long after the last crumb is devoured. Very very chocolately, soft and moist....what more could you possibly want from a chocolate cake?


Perfect entry, I think, for the 'Best Chocolate Cake' event hosted by Divya!
Edited to add...My apologies to all who land on this page and don't find a recipe. Please email me for the recipe.
aquadaze@rediffmail.com
Wednesday, February 24, 2010
Chocolate Fudge Cake
Every time I go to India, there is a family gathering featuring an assortment of aunts, uncles and some cousins. Oh, I really love these family get-togethers. It feels great to meet the extended family after long intervals and exchange notes on all that's been happening in our lives. The evening stretches long and the chatter is endless. Food and drink flow; starters, main courses and desserts happily inter-mingle. Photographs are passed around and gossip is shared.
The family get-together last December when I went to Pune was no different, except that at some point in the evening, the conversation suddenly veered to recollections of "what Aqua did when she was young".
I must have been some kind of a nut, for everyone had some incident or the other to share, every incident seemed more embarrassing than the previous one and all I wanted to do was burrow a hole somewhere and hibernate till the evening came to an end!
But what really ...er... took the cake was what my aunt had to say. About the time when I helped myself to spoonfuls of cake batter. Apparently, she was baking her famous chocolate fudge cake and left the kitchen after preparing the batter while waiting for the oven to heat up. It seems, unable to resist her greed, yours truly tiptoed into the kitchen and ate up some batter! And then denied it, in spite of remnants of the batter sound her lips.
She had brought along that very chocolate fudge cake for the evening; not only did she give me a large slice but also (finally!) parted with her fabulous recipe.
Very chocolately with just a hint of vanilla, this super moist cake can stand on its own without any frosting. You won't stop at just one slice, of that I am certain!

Ingredients:
Unsalted butter: 90 gms
Sugar: 200 gms
Vanilla essence: 1 tsp
Eggs: 2
Cocoa: 40 gms
All purpose flour: 200gms
Baking soda: 1/2 tsp
Salt: 1/4 tsp (omit if using salted butter)
Hot water: 90 ml
Buttermilk: 180 ml
Method:
Sift together the flour, baking soda and salt.
Blend the cocoa into the hot water, stir well so that no lumps remain.
Cream together the butter and sugar till light and fluffy. Add the essence and beat a minute.
Add the eggs, one at a time, beating for a minute after you add each egg.
Now add the buttermilk and the cocoa mixture alternately to the batter, starting and ending with the buttermilk. The mixture will be very watery at this point.
Finally, fold in the flour to get a smooth batter.
Pre-heat the oven for 10 mins and bake in a tube pan at 200 deg C for 40 mins or until a skewer inserted comes out clean.
Notes:
My aunt sometimes adds coffee to this cake. If you decide to add coffee, omit the vanilla essence and instead mix 1.5 tsps of coffee to the hot water along with the cocoa.
I feel that adding cinnamon would do wonders to the taste, the next time I plan to ditch both vanilla and coffee in favour of cinnamon. Will definitely keep you posted!
The recipe states a baking time of 40 mins, but it took me 50 mins to bake mine. So, I would recommend that you set the timer for 40 mins and bake in 10 min increments, if the cake is not done.
I don't have a tube pan and instead baked it in a bundt pan. Whilst my aunt's cake has scarcely any cracks, mine had a few. So I guess this cake is best baked in a tube pan.
Since chocolate is always associated with Valentine's Day, sending this chocolate fudge cake to Nina who is hosting a Bake-a-Cake event as part of Valentine's Day celebrations.


